

In This Article
Here’s a confession every home barista eventually makes: you can own a £900 espresso machine with a wand that screams like a kettle possessed, and still pour a latte that looks like a Rorschach test gone wrong. The missing link usually isn’t the machine. It’s the jug in your hand. A good barista milk pitcher for latte art is the one piece of kit that turns “vaguely heart-shaped splodge” into something you’d photograph before drinking. In simple terms, it’s a spouted steel jug, typically 350-600ml, purpose-built to texture milk into microfoam and then pour it with enough control to draw a shape on top of your espresso. The technique itself has a surprisingly short history — as Wikipedia’s overview of latte art explains, the free-pour style most home baristas chase today only really took off from the late 1980s onward, despite espresso itself being over a century old.

This guide exists because most “best of” lists online are recycled spec sheets dressed up as advice. We’ve dug into real product listings, genuine aggregated review sentiment, and the actual physics of why milk behaves the way it does under steam, so you’re getting commentary you can act on rather than a list of numbers with no context. We’ll compare seven real, currently available pitchers spanning budget, mid-range and premium territory, explain how spout shape and jug geometry change your pour, and walk through the setup, maintenance and technique that Amazon listings conveniently leave out.
Whether you’re chasing your first wobbly heart or trying to tighten up a tulip with four distinct leaves, the right jug won’t do the work for you — but the wrong one will actively fight you. Let’s sort out which is which, using UK pricing and UK stockists throughout, because half these guides are written for American kitchens and American plugs.
Quick Comparison Table
| Pitcher | Capacity | Spout Type | Handle | Best For |
|---|---|---|---|---|
| Motta Europa | 350-750ml | Bell/beak spout | Traditional | Classic all-rounder, café-standard pours |
| Fellow Eddy | 350ml / 530ml | Fluted, sharp crease | Open-ended ribbon | Beginners wanting forgiving control |
| MHW-3BOMBER Crocodile | 500ml | Twin-groove crocodile | Traditional | Advanced patterns, competition practice |
| Normcore Handleless (Sharp) | 450ml | Sharp precision spout | None | Intricate rosettes and tulips |
| Subminimal FlowTip | 450ml | Precision handleless | None | Stovetop and small-batch home setups |
| Rattleware Handle-Free | 600ml (20oz) | Round spout | None | Budget-conscious handleless practice |
| AMZCHEF Latte Art Starter | 350ml | Point-mouth | Traditional | Absolute beginners on a tight budget |
At a glance, the spread here tells its own story: capacity ranges from a single-cortado-sized 350ml up to a family-latte-round 750ml, and spout design splits roughly down the middle between traditional beak-style pours and the newer breed of precision-ground spouts. If you’re pouring one flat white at a time, the smaller jugs in this table will feel far more responsive in the hand; if you’re doing a Sunday brunch for six, you’ll want the Motta Europa in its larger sizing or the Rattleware’s 600ml capacity. Handleless designs like the Normcore and Subminimal aren’t a gimmick — they genuinely change your wrist mechanics, which we’ll unpack properly in the sections below.
💬 Just one click — help others make better buying decisions too!😊
Top 7 Barista Milk Pitchers for Latte Art: Expert Analysis
1. Motta Europa — the original Italian latte art icon
If you’ve ever watched a barista training video, there’s a strong chance the jug in shot was a Motta Europa. Made in Italy from 18/10 stainless steel, it’s the pitcher most professional courses use as their default teaching tool, and for good reason.
The Motta Europa comes in three main sizes — roughly 350ml, 500ml and 750ml — and its defining feature is a bell-shaped body that tapers into a sharply pinched beak spout. In practice, that shape means the milk naturally circulates into a tight vortex as you steam, which does a lot of the heavy lifting in breaking down large bubbles before you’ve even started pouring. The thick-gauge steel also absorbs heat slowly, giving you a slightly longer window to judge temperature by touch rather than guesswork.
Based on the spec comparison with cheaper alternatives, the Motta Europa‘s main advantage isn’t flashiness — it’s consistency. This is the pitcher for someone who wants one reliable tool for years rather than a novelty item they’ll swap out in six months. Reviewers consistently report that the weight and balance feel noticeably more “professional” than budget imports, and the main recurring criticism in aggregated feedback is that the mirror-polished finish shows fingerprints and water spots unless dried immediately after washing.
Pros:
- ✅ Café-standard bell shape aids natural milk vortexing
- ✅ Heavy-gauge steel holds heat evenly for longer texturing windows
- ✅ Available in three sizes to match different drink volumes
Cons:
- ❌ Polished finish shows water spots and fingerprints easily
- ❌ No handleless option if that’s your preferred style
Prices for the Motta Europa typically sit in the £25-£40 range depending on size, check current price for exact availability. Given its longevity and near-universal café use, it represents strong value for anyone serious about building a technique that will transfer directly to commercial machines.

2. Fellow Eddy — sharpest fluted pour of the lineup
The Fellow Eddy looks like it escaped from a design museum, and that’s not an accident — Fellow built its reputation on kettles and grinders that photograph as well as they perform, and the Fellow Eddy milk pitcher continues that streak.
What sets the Fellow Eddy apart mechanically is its fluted spout combined with a sharp front crease running the length of the body. That crease physically channels the milk forward in one continuous line as you tilt the jug, which in practice reduces the “wobble” that trips up new pourers who tend to jerk the pitcher rather than tilt it smoothly. The 12oz (350ml) and 18oz (530ml) sizes both feature internal volume markings, a small but genuinely useful touch for beginners still learning how much milk a given cup size actually needs.
What most buyers overlook about this model is the open-ended ribbon handle, which lets you choke up or down the grip depending on the angle you’re pouring at — something a fixed C-handle simply won’t allow. Aggregated customer sentiment is largely positive on build quality and pour precision, with the most common critique being that the graphite finish, while striking, can show scratches over time compared with plain polished steel.
Pros:
- ✅ Fluted spout with front crease smooths out pour wobble
- ✅ Internal volume markings help beginners measure milk
- ✅ Flexible open-ended handle suits multiple grip styles
Cons:
- ❌ Graphite finish shows scratches more than plain steel
- ❌ Premium pricing versus similarly sized competitors
At around £35-£45, the Fellow Eddy sits firmly in mid-to-premium territory, but for anyone who’s fought with a cheap jug’s unpredictable pour, the front-crease design genuinely earns its keep — this is design solving a real technical problem, not just aesthetics for its own sake.
3. MHW-3BOMBER Crocodile Spout — competition-grade precision pouring
Specialty coffee gear can get gimmicky fast, but the MHW-3BOMBER Crocodile Spout pitcher backs up its unusual name with genuine engineering. The “crocodile” refers to a twin-groove diversion channel built into the spout, designed to split and redirect milk flow for sharper contrast lines in complex patterns.
At 500ml (16.9oz), the MHW-3BOMBER Crocodile Spout sits comfortably in the mid-capacity bracket, and it’s built from food-grade 304 stainless steel with a seamless interior that resists the residue buildup you sometimes get in cheaper pressed-seam jugs. What the spec sheet won’t tell you, but reviewers note, is that this pitcher rewards practice rather than forgiving beginners outright — the sharper spout geometry that makes tulips and rosettas crisper in experienced hands can feel unpredictable if you’re still learning basic wrist control.
Here’s what to weigh: this is a pitcher built for people already comfortable pouring a basic heart who want to push into layered tulips and swans. It’s associated with competitive latte art circles, and the double-arced groove genuinely does produce cleaner contrast between white foam and crema than a standard round spout — this isn’t marketing fluff, it’s a function of how the milk stream gets shaped before it leaves the jug.
Pros:
- ✅ Twin-groove spout sharpens contrast in complex patterns
- ✅ Seamless 304 steel interior resists residue buildup
- ✅ Available in multiple finishes including matte black
Cons:
- ❌ Steeper learning curve than round-spout alternatives
- ❌ Overkill for anyone only pouring simple hearts
Priced around £30-£40 depending on finish and retailer, the MHW-3BOMBER Crocodile Spout isn’t the first jug you should buy, but it’s a genuinely strong second purchase once your fundamentals are solid.
4. Normcore Handleless (Sharp Spout) — maximum control, zero handle drag
Handleless pitchers look strange the first time you see one, like a jug that’s lost a limb, but the Normcore Handleless design has a loyal following for a specific reason: removing the handle removes a pivot point, and that changes how directly your wrist movement translates into the pour.
The Normcore Handleless comes in a Sharp Spout variant, engineered specifically to slow the milk flow for more deliberate, detailed pouring — useful when you’re trying to draw fine lines rather than dump volume quickly. A heat-resistant silicone grip wraps the body so you’re not gripping bare hot steel, and a small strip of exposed metal at the base lets you touch-test the milk’s temperature without reaching for a thermometer. Available in 450ml and 600ml sizes, it covers everything from a single flat white to a generous latte.
Based on the spec comparison, what most buyers overlook about handleless designs generally is that they’re not automatically “better” — they’re different, and that difference suits people who find a handle gets in the way of rotating the jug during a pour. Reviewers consistently report that the sharp spout variant, in particular, takes some adjustment if you’re used to a standard beak, since it forces a slower, more controlled stream than you might be expecting.
Pros:
- ✅ Handleless design removes pivot-point interference
- ✅ Sharp spout enables slow, detailed pouring control
- ✅ Silicone grip stays comfortable during hot pours
Cons:
- ❌ Requires re-learning grip habits from handled jugs
- ❌ Some users miss the stability of a fixed handle
At roughly £20-£30, the Normcore Handleless undercuts several premium competitors while offering a genuinely different pouring feel — it’s a strong pick for anyone whose latte art has plateaued and suspects their handle habits are the culprit.
5. Subminimal FlowTip — stovetop-friendly handleless design
The Subminimal FlowTip takes the handleless concept and adds a wrinkle: it’s built with home setups in mind, including stovetop moka-pot users who don’t have a dedicated steam wand but still want proper pouring control for milk they’ve frothed by other means.
Constructed at 450ml, the Subminimal FlowTip pairs a precision spout with a heat-resistant handle detail moulded into the body itself, giving you something to grip near the base even without a traditional loop handle. The brand markets this specifically toward people building out a full home barista kit rather than commercial baristas, which shows in details like the slightly wider base for stability on a kitchen counter rather than a bar top designed for speed.
On paper this means the Subminimal FlowTip trades a little of the razor-sharp precision you’d get from a competition-focused jug like the MHW-3BOMBER Crocodile Spout in exchange for everyday practicality — easier to clean, less fussy about grip technique, and priced to match a home rather than commercial budget. Aggregated feedback on handleless Subminimal jugs tends to praise the balance and non-slip base, while the recurring gripe is that, like most handleless designs, it takes a session or two before it stops feeling awkward in the hand.
Pros:
- ✅ Designed specifically for home and stovetop setups
- ✅ Wider stable base suits kitchen counters over bar tops
- ✅ Moulded grip detail eases the handleless learning curve
Cons:
- ❌ Less razor-sharp precision than competition-focused spouts
- ❌ Handleless adjustment period still applies
Typically found in the £20-£30 range, the Subminimal FlowTip is a sensible middle ground for home baristas who like the handleless concept but aren’t ready to commit to the steepest learning curve on this list.

6. Rattleware Handle-Free Pitcher — best value handleless option
Not every good tool needs a design story. The Rattleware Handle-Free Pitcher is a straightforward, no-frills 20oz (roughly 600ml) handleless jug that’s popular precisely because it doesn’t try too hard — it’s the kind of pitcher you’ll find in independent cafés that care about function over Instagram appeal.
Built in stainless steel with a round spout, the Rattleware Handle-Free Pitcher is aimed squarely at people who want to try handleless pouring without paying premium-brand prices for the privilege. Its larger 600ml capacity makes it a sensible choice for households making multiple drinks back-to-back, since you won’t be re-filling and re-steaming between each cup. Reviewers consistently note that the balance feels solid despite the lower price point, though the round spout — rather than a sharpened or fluted one — means it’s better suited to basic hearts and rosettas than intricate multi-layer patterns.
Here’s what to weigh: if you’re curious about handleless pouring but not convinced it’s worth £30+ to find out, the Rattleware Handle-Free Pitcher is the lowest-risk way to test the waters. It won’t win competitions, but it will teach you whether the technique suits your hands before you spend more on something like the Normcore Handleless.
Pros:
- ✅ Generous 600ml capacity handles multiple drinks at once
- ✅ Genuinely affordable entry into handleless pouring
- ✅ Solid, well-balanced feel despite the lower price
Cons:
- ❌ Round spout limits precision for complex patterns
- ❌ Fewer size options than premium competitors
At around £15-£25, the Rattleware Handle-Free Pitcher offers one of the best value-per-pound ratios on this list, particularly for anyone still deciding whether handleless jugs are a genuine upgrade or just a novelty.
7. AMZCHEF Latte Art Starter Set — most affordable way to begin
Every list needs an honest entry point, and the AMZCHEF Latte Art Starter Set is exactly that: a 350ml stainless steel pitcher bundled with a latte art decorating pen, aimed squarely at people who don’t yet know if they’ll stick with this hobby and don’t want to spend big to find out.
The AMZCHEF Latte Art Starter Set uses a point-mouth spout design intended to reduce dribbling as you pour, and the body carries measurement markings so beginners can gauge milk volume without guesswork. It’s not going to out-perform a Motta Europa or Fellow Eddy on pour precision — the steel gauge is noticeably thinner, and the spout geometry is a simpler, less refined shape — but for someone’s very first jug, that’s arguably beside the point.
The spec sheet won’t tell you this, but user reports suggest the included decorating pen is genuinely useful for etching designs on top of poured foam while you’re still building free-pour confidence, giving you a fallback method that doesn’t rely purely on wrist control. What most buyers overlook about budget pitchers like this one is that they’re an excellent way to learn the fundamentals of steaming — vortex creation, temperature judging, basic tilt-and-pour — before investing in a jug whose sharper spout would otherwise punish beginner mistakes.
Pros:
- ✅ Genuinely low price point for total beginners
- ✅ Bundled decorating pen adds a beginner-friendly fallback
- ✅ Measurement markings help with portion learning
Cons:
- ❌ Thinner steel gauge than mid-range and premium jugs
- ❌ Spout precision falls short for advanced patterns
Usually priced under £15, the AMZCHEF Latte Art Starter Set won’t be the pitcher you own in three years, but as a low-stakes way to find out whether latte art is a hobby worth investing in further, it’s hard to beat on value.
Practical Usage Guide: Setting Up and Maintaining Your Milk Pitcher
Buying the right barista milk pitcher for latte art is only step one — how you set it up and look after it determines whether it performs like the reviews promised or ends up gathering dust in a cupboard. Start by filling only to the point where the spout curve begins, never higher; milk roughly doubles in volume as it aerates, and overfilling is the single most common reason home baristas end up with milk spilling over the rim mid-pour. For a standard flat white, that usually means starting with 100-120ml of cold milk in a 350ml jug.
Before your first use, wash the pitcher by hand with warm soapy water rather than immediately trusting the dishwasher-safe label — this lets you check the spout for any manufacturing residue and confirms the finish reacts well to your usual washing-up liquid. During the first 30 days, the most common mistake isn’t technique, it’s temperature: many beginners over-steam out of nervousness, pushing milk well past 70°C where it starts to taste scalded and the foam structure begins to collapse. A cheap milk thermometer clipped to the rim removes the guesswork while you calibrate your “hand on the pitcher” instinct.
Maintenance-wise, stainless steel pitchers are forgiving but not indestructible. Rinse immediately after each use — dried milk residue is far harder to shift once it’s baked onto the interior by residual heat, and it can start affecting the taste of subsequent pours within days if neglected. Avoid abrasive scourers on polished finishes like the Motta Europa, since they’ll dull the mirror shine permanently; a soft cloth and a mild descaling solution once a fortnight is usually sufficient for anyone steaming milk daily. If you notice your pour becoming less consistent over months of use, check the spout edge for dents — a knocked spout, even a subtle one, changes flow rate more than most people expect.
Real-World Scenarios: Which Pitcher Suits Your Coffee Life
Specs only tell half the story; how a pitcher fits your actual routine tells the rest. Consider three fairly typical home baristas and how their needs diverge.
The weekday commuter learning on a budget. If you’re making one flat white before work and don’t yet know whether latte art will become a genuine hobby, the AMZCHEF Latte Art Starter Set or the Rattleware Handle-Free Pitcher make more sense than a premium jug. You need something forgiving and cheap enough that a few early mistakes don’t sting, with a size — 350-600ml — that matches single-serve steaming without wasting milk on a jug built for café volume.
The Sunday brunch host feeding a crowd. If you’re regularly steaming milk for four or five drinks in one sitting, capacity becomes the deciding factor over spout sophistication. The 750ml Motta Europa or the 600ml Rattleware Handle-Free Pitcher reduce how often you’re re-filling and re-steaming, which matters more for a crowd than shaving seconds off spout precision on any single pour.
The dedicated hobbyist chasing competition-level patterns. If you’ve already mastered a clean heart and rosette and want to progress into layered tulips or swans, the MHW-3BOMBER Crocodile Spout or Fellow Eddy offer the spout geometry that actually enables tighter contrast lines — a budget pitcher’s blunter spout will cap your progress regardless of how much you practise. Pairing either with a Normcore Handleless for wrist-control drills is a common combination among serious enthusiasts.
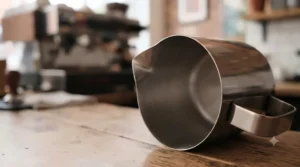
How to Choose a Barista Milk Pitcher for Latte Art
What is a barista milk pitcher for latte art? It’s a spouted stainless steel jug, typically 350-600ml, designed to texture and pour steamed milk with enough precision to create free-pour patterns like hearts, rosettas and tulips on espresso-based drinks.
Choosing the right one comes down to a handful of practical criteria rather than brand reputation alone:
- Match capacity to your typical drink volume. A 350ml pitcher suits single cortados and flat whites; anything above 500ml is better suited to lattes or multiple back-to-back drinks.
- Consider spout sharpness relative to your skill level. Sharper, narrower spouts reward experienced pourers with tighter contrast but punish beginner inconsistency; rounder spouts are more forgiving while you learn.
- Decide on handled versus handleless early. Handleless jugs change wrist mechanics fundamentally — it’s worth trying one before committing, since it’s not a minor stylistic choice.
- Check the steel gauge, not just the grade. Both 304 and 18/10 steel are food-safe, but thinner gauges heat up faster and offer less thermal buffer while you’re learning to judge temperature.
- Look for internal or external measurement markings if you’re new. They remove one variable while you’re still building intuition for milk volume.
- Factor in maintenance realism. Mirror-polished finishes look fantastic in photos but show water spots quickly — if you won’t dry it immediately after every wash, a matte or coloured finish will age better.
- Buy for where you’ll be in six months, not just today. A pitcher that’s too forgiving can plateau your progress once fundamentals click, so budget beginners often benefit from planning a second, sharper-spouted purchase down the line.
Narrow Spout Milk Pitcher vs Wide Spout: What Actually Changes Your Pour
This is one of the most misunderstood distinctions in latte art gear, so it’s worth unpacking properly. A narrow spout milk pitcher, like the sharp-spout variants from Normcore or the crocodile design on the MHW-3BOMBER, restricts the milk stream into a thinner, more controllable flow. That narrower stream gives you more precise placement when drawing fine lines — the tips of tulip leaves, the crisp edge of a rosetta — because there’s simply less volume moving at once, which means less room for the stream to wander off course.
A wider spout, by contrast, releases more milk more quickly, which is genuinely useful when you’re trying to build base volume fast or execute simpler shapes like a straightforward heart, where speed and confident volume matter more than pinpoint accuracy. The trade-off is control: wide spouts are less forgiving of small wrist wobbles because there’s more milk mass moving in an unpredictable direction if your angle drifts even slightly.
In practice, most experienced baristas end up gravitating toward narrower spouts as their skill develops, simply because the ceiling on what you can achieve with a wide, round spout is genuinely lower for intricate patterns — no amount of practice will make a round-spout jug produce the same crisp contrast lines as a well-designed narrow one. That said, a narrow spout in beginner hands often produces worse results than a wide one, purely because it demands more consistent wrist control than a newcomer has yet developed. If you’re just starting out, don’t assume “narrow equals better” — match the spout to your current skill level, not your aspirational one.
Latte Art Milk Jug Design: Understanding Spouted Jug Design
The term latte art milk jug covers a surprisingly wide range of engineering choices, and the spouted jug design specifically refers to how the pouring lip is shaped, angled and positioned relative to the jug’s body. Three design elements matter most.
Spout angle. A steeply pinched spout, like the Motta Europa’s beak, concentrates the pour into a tighter stream earlier, while a flatter, wider spout — closer to a standard measuring jug — spreads the flow before it leaves the lip. The steeper the pinch, generally, the more control you get at the cost of flow speed.
Body taper. The bell-shaped taper found on classic Italian designs isn’t just aesthetic; it directly influences how milk circulates during steaming, encouraging the rolling vortex motion that breaks down large bubbles into fine microfoam. Straighter-sided jugs, more common on budget models, can still texture milk well but tend to require slightly more active technique from the person steaming to achieve the same circulation.
Lip thickness and edge finish. A thinner, more precisely machined lip edge — the kind found on premium jugs like the Fellow Eddy — cuts the milk stream more cleanly as you tilt and stop pouring, reducing unwanted dribbles. Thicker or less refined edges, common on entry-level pitchers, are more prone to “trailing,” where a small amount of milk continues to leak after you’ve stopped tilting, which can smudge an otherwise clean pattern right at the finishing stroke.
Understanding these three elements is genuinely more useful than comparing brand names, because two jugs from completely different manufacturers with similar spout angle, taper and lip finish will behave almost identically in the hand, regardless of price.
Milk Jug for Home Barista Latte Art: Sizing and Capacity Guide
Picking the right size milk jug for home barista latte art use is less about following café convention and more about matching your actual drink habits. Commercial cafés often default to large-capacity jugs because they’re steaming for a queue, but at home, an oversized pitcher for a single flat white just means more empty headspace above the milk line — and less control, since your wrist has to compensate for a mostly-empty vessel that moves differently than a well-filled one.
As a rough guide: a 350ml jug comfortably handles a single cortado or flat white, using around 100-130ml of milk before steaming. A 450-600ml jug suits a standard latte or two smaller drinks made back-to-back without re-filling. Anything above 600ml starts to make sense only if you’re regularly serving three or more people, or if you specifically prefer the extra headspace some baristas find gives smoother vortex control during steaming, even for a single drink.
It’s also worth owning two sizes if your household drink orders vary — a smaller pitcher for solo espresso drinks and a larger one for weekend gatherings avoids the awkward middle-ground compromise of using one jug for everything. Several of the pitchers in this guide, including the Motta Europa, are sold across multiple sizes specifically to let you build out a small collection without switching brands or relearning spout behaviour each time.
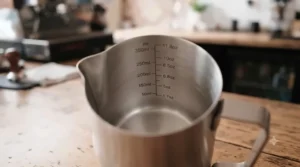
Mastering Milk Texture and Microfoam
Milk texture microfoam is the technical heart of latte art, and it’s worth understanding the actual food science rather than relying on vague café folklore. Research on milk foaming behaviour has established that milk proteins — primarily casein and whey — are what stabilise foam bubbles, with caseins in particular playing an outsized role in holding the air-liquid interface together as bubbles form during steaming. A recent peer-reviewed review of milk foam science confirms that foamability and foam stability are shaped by protein content, pH, the casein-to-whey ratio, and heat treatment, all interacting to determine how well a given milk holds its structure once steamed.
This matters practically because it explains several things baristas learn by trial and error. Cold, fresh milk foams more reliably because proteins are more stable and haven’t begun denaturing — which is why every serious guide insists on starting with milk straight from the fridge, ideally around 4°C. It also explains why over-steaming past roughly 65-70°C damages your foam: heat denatures the whey proteins responsible for part of the foam’s structure, which is why milk pushed too hot often collapses into large, uneven bubbles rather than holding fine microfoam. Milk fat, meanwhile, tends to work against sheer foam volume while fat globules are still partially crystalline at lower steaming temperatures, but it contributes a fuller, creamier mouthfeel in exchange — which is part of why whole milk and skimmed milk froth so differently, not just in volume but in texture and taste.
Practically, this translates into a two-stage steaming process: a brief “stretching” phase where you introduce air near the surface to build volume, followed by a longer “rolling” phase where the wand sits deeper to create a tight vortex that breaks large bubbles into the fine, glossy microfoam that actually holds a pattern. Skipping straight to rolling without stretching gives you dense, foam-poor milk; over-stretching without enough rolling gives you a pitcher full of shaving-foam-like bubbles that won’t pour a clean line no matter how good your jug is.
Latte Art Technique: From Pitcher to Pour
Good latte art technique starts before you even pick up the pitcher — it starts with the espresso itself, since crema quality directly affects how well a pattern shows contrast against the coffee beneath it. Once you’ve got a solid shot pulled, the pouring sequence generally follows a predictable structure that’s worth practising as a repeatable routine rather than reinventing each time.
Begin by pouring from a height of a few centimetres above the cup, letting the milk sink beneath the crema to build base volume without disturbing the surface too much. As the cup fills, lower the pitcher closer to the surface — this is the point where your chosen spout design starts to matter enormously, since a narrow, well-controlled stream lets you begin “drawing” a shape as the foam rises to meet the surface. Gentle side-to-side wagging motions, combined with a steadily increasing pour speed, are what produce the classic rosetta’s rippled leaves; a straight, unwavering pour into the centre produces a simple heart.
Three common problems and their fixes are worth flagging specifically. First, if your pattern sinks rather than sitting on the surface, your foam is likely too thin — you’ve under-textured the milk, and more rolling during steaming is the fix, not pouring technique. Second, if your pattern smears or blurs the moment you finish pouring, dribbling from an unrefined spout edge is often the culprit — this is precisely where upgrading from a budget jug like the AMZCHEF Latte Art Starter Set to something with a cleaner lip finish, such as the Fellow Eddy, can solve a problem that no amount of practice will fix on its own. Third, if patterns look muddy with poor contrast, check your espresso — thin, over-extracted crema simply won’t provide the colour contrast a well-textured pour needs, regardless of pitcher quality. For a deeper technical breakdown of pouring rhythm and timing, this UK-based barista technique guide is a genuinely useful supplementary read once you’ve got your pitcher sorted.
Common Mistakes When Buying a Milk Pitcher
Even careful shoppers make predictable errors here, and most of them come down to over-indexing on one spec while ignoring how the whole jug behaves as a system. The single biggest mistake is buying based on capacity alone, assuming bigger is simply better — an oversized jug for your typical drink volume genuinely makes pouring harder, not easier, because you lose the tight control that comes from a well-filled, appropriately sized vessel.
A second common error is chasing a premium, competition-grade spout — like the MHW-3BOMBER Crocodile — as a first-ever pitcher, expecting the sharper geometry to somehow accelerate learning. In practice it usually does the opposite, punishing the wrist inconsistency every beginner has before technique settles in. A third mistake is ignoring handle style entirely, buying whichever jug looks best in photos without considering whether a handleless design actually suits how you naturally grip and rotate objects — this is genuinely a personal preference issue, not something specs alone can answer, which is why we’d encourage trying a budget handleless option like the Rattleware Handle-Free Pitcher before committing to a premium one.
Finally, plenty of buyers underestimate maintenance realism, picking a mirror-polished finish for its café-standard look without accounting for how quickly water spots and fingerprints show up if you’re not drying it immediately after each wash. None of these mistakes are expensive to fix individually, but stacked together they’re a common reason people conclude “latte art just isn’t for me” when the real issue was a mismatched first purchase.
Long-Term Cost & Maintenance
Thinking about total cost of ownership rather than just sticker price changes the calculus on several pitchers in this guide. A £12 budget jug like the AMZCHEF Latte Art Starter Set looks like the obvious value pick on price alone, but thinner steel gauges are more prone to denting, and a dented spout genuinely changes pour behaviour — meaning a budget jug may need replacing within a year or two of regular use, while a heavier-gauge jug like the Motta Europa is realistically a once-per-decade purchase for most home users.
Maintenance cost is mostly time rather than money: hand-washing and immediate drying take perhaps thirty extra seconds per use compared with leaving a jug to air-dry, but that habit is what preserves a polished finish over years rather than months. Descaling isn’t usually necessary for milk pitchers the way it is for kettles, since you’re not boiling mineral-heavy water inside them, but a periodic deep clean with a mild solution prevents milk-fat residue building up invisibly on interior seams, particularly on jugs with a pressed rather than seamless construction.
Cost-per-use, spread across a realistic three-to-five-year ownership window, actually narrows the gap between budget and premium options considerably — a £35 Fellow Eddy used daily for four years works out to roughly two pence per use, which puts the “premium” framing into useful perspective. The real long-term cost risk isn’t the jug itself; it’s buying the wrong spout profile for your skill level and needing a second purchase sooner than expected.

Safety, Materials & Food-Contact Standards
Because a milk pitcher sits in direct, repeated contact with food, material safety is worth understanding rather than taking on trust. In the UK, kitchen items like jugs fall under food contact material regulations enforced by the Food Standards Agency, which require materials not to release constituents into food at levels that could harm health or noticeably change taste. Nearly every pitcher in this guide is made from 304 or 18/10 stainless steel, both of which are widely recognised food-safe grades that resist corrosion and won’t leach flavours into milk the way some lower-grade metals or certain plastics can.
Practically, this means the material choice across our seven picks is genuinely not a safety differentiator — they’re all built to comparable food-contact standards. Where it does matter is durability and hygiene over time: welded handle joints, like those on the Motta Europa, should be checked periodically for hairline gaps where bacteria-harbouring residue could theoretically collect, while seamless-construction jugs such as the MHW-3BOMBER Crocodile Spout have a genuine hygiene advantage in reducing hidden seams altogether. Always hand-wash promptly after use regardless of dishwasher-safe claims on the packaging, since prolonged exposure to dishwasher heat and detergent can, over years, dull protective finishes faster than the manufacturer’s marketing tends to suggest.
Features That Actually Matter (And Those That Don’t)
Cutting through marketing language, some features genuinely change your results while others are largely cosmetic. Spout geometry matters enormously — as covered above, it’s the single biggest determinant of pour control and pattern precision, full stop. Steel gauge and body taper matter too, directly affecting both heat retention and how naturally milk vortexes during steaming.
Internal measurement markings matter, but only for beginners; once you’ve made a few hundred lattes, you’ll judge volume by eye and the markings become largely irrelevant, so don’t pay a premium for them if you’re already experienced. Colour and finish, by contrast, are almost entirely cosmetic — a matte black MHW-3BOMBER and a polished silver version perform identically; the choice is purely about kitchen aesthetics and, as noted earlier, how forgiving the finish is of fingerprints during your washing-up routine.
Bundled accessories, like the decorating pen included with the AMZCHEF Latte Art Starter Set, add genuine beginner value but shouldn’t be a deciding factor if the core jug itself doesn’t suit your needs — a good pen paired with a poorly designed spout won’t compensate for the underlying pour mechanics. And handle style, while it does matter, is genuinely a matter of personal technique preference rather than one style being objectively superior — the “best” pitcher for a friend whose latte art you admire may simply not suit your own hand and wrist mechanics.
Benefits vs Traditional Alternatives
| Feature | Barista Milk Pitcher | Standard Measuring Jug | Frothing Mug/Cup |
|---|---|---|---|
| Spout precision for pouring patterns | High | Low | Very low |
| Designed for steam wand use | Yes | No | Sometimes |
| Vortex-friendly body shape | Yes (bell/tapered) | No | No |
| Volume measurement markings | Common on beginner models | Standard | Rare |
| Best For | Latte art, precise pouring | Basic measuring tasks only | Simple hot chocolate froth |
The comparison above makes the case plainly: a standard kitchen measuring jug or a generic frothing mug simply wasn’t engineered for the two-stage steaming and precision pour that latte art demands, and no amount of practice fully compensates for a body shape that doesn’t encourage vortex circulation. That’s not to say you can’t texture milk in a regular jug — you can, technically — but the pattern definition and pour control you’ll get from any of the seven purpose-built pitchers above will be immediately, obviously better. If you’re serious enough about latte art to be reading a 4,000-word comparison guide, a dedicated pitcher isn’t an indulgence; it’s the baseline tool for the job.
✨ Ready to Pour Better Latte Art?
🔍 Whichever pitcher matches your budget and skill level, check current pricing and availability before you buy — stock and pricing on these barista essentials shift often. A well-matched jug is the fastest upgrade you can make to your home coffee setup this year!

FAQ
❓ What size milk pitcher is best for latte art beginners?
❓ Do I need a handleless milk pitcher for latte art?
❓ What's the best milk for latte art at home?
❓ Why does my milk pitcher spout dribble after pouring?
❓ How often should I replace my milk frothing pitcher?
Conclusion
If there’s one thing worth taking away from all this, it’s that a barista milk pitcher for latte art isn’t just a vessel — it’s a precision tool whose spout geometry, body taper and handle style each shape your pour in ways specs alone don’t fully capture. For most home baristas starting out, the Motta Europa or Fellow Eddy offer the most forgiving path to genuinely good results, while the MHW-3BOMBER Crocodile Spout and Normcore Handleless reward those already comfortable with the fundamentals and hungry to push into more advanced patterns. Budget-conscious beginners shouldn’t feel pressured into premium territory either — the AMZCHEF Latte Art Starter Set and Rattleware Handle-Free Pitcher are entirely capable of teaching solid fundamentals for a fraction of the price.
What matters most isn’t which single jug ranks “best” in the abstract, but which one matches your actual drink volume, current skill level, and willingness to maintain a finish properly. Buy for where your technique realistically is today, practise the two-stage steaming approach we’ve covered, and trust that the pitcher will stop being your bottleneck long before your patience does.
Recommended for You
- Best Milk Pitcher 2026: 7 Top Picks Every UK Barista Rates
- Espresso Cup Gift Set: 7 Best Picks for UK Coffee Lovers (2026)
- 7 Best Double Walled Espresso Cups for 2026 (Honest UK Guide)
Disclaimer: This article contains affiliate links. As an Amazon Associate, I earn from qualifying purchases. If you purchase products through these links, we may earn a small commission at no additional cost to you.
✨ Found this helpful? Share it with your friends! 💬🤗
