
In This Article
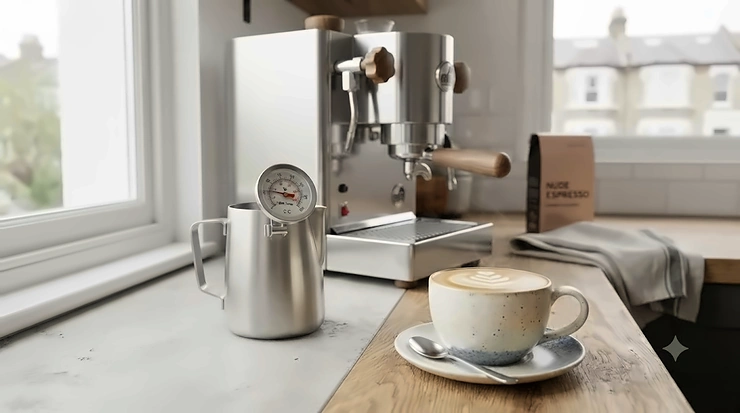
A milk thermometer for espresso is a small analogue or digital probe, clipped or stuck to a steaming pitcher, that reads the milk’s temperature in real time so you can stop steaming at the exact moment sweetness peaks and before the proteins scorch. That’s the whole job, in one sentence — and yet it’s arguably the cheapest upgrade you can make to a home espresso setup that actually changes how your coffee tastes.
Here’s the thing nobody tells you when you buy your first espresso machine: the machine makes the shot, but the milk makes the drink. Pull a flawless double ristretto, then dump in milk that’s been steamed to a wobbly guess of “hot enough,” and you’ve just diluted good coffee with something closer to bathwater. Get the milk right, though — silky, glossy, sweet without a grain of added sugar — and even a mediocre shot tastes like it came from a proper café. Temperature is the hinge that whole outcome swings on, and eyeballing it is a habit almost every home barista eventually gives up.
This guide walks through what temperature to steam milk for espresso and why that narrow window matters so much, then compares seven real, currently available milk thermometers spanning clip-on dials, a stick-on strip, and a digital model with an alarm. You’ll also find honest, aggregated-review-based verdicts (never invented quotes), a milk scalding prevention section that could save your tongue and your Tuesday-morning latte, and a straight comparison of dial versus digital versus strip so you can pick with confidence rather than guesswork.
Quick Comparison Table
| Thermometer | Type | Best For | Price Range |
|---|---|---|---|
| Rhinowares Short Milk Thermometer | Clip-on dial | Small pitchers, tight budgets | Under £15 |
| Rhinowares Long Stem Milk Thermometer | Clip-on dial | Large jugs, batch steaming | Around £15-£20 |
| Rhino Digital Milk Frothing Thermometer | Digital, with alert | Precision-focused home baristas | £20-£30 range |
| Rhino Accutemp Milk Thermometer Sticker | Stick-on strip | Hands-free, minimalist setups | Under £10 |
Even at a glance, the spread here tells its own story: dial thermometers dominate the budget-to-mid tier because they need no batteries and rarely fail, while the digital option earns its premium through an audible alert that frees you from watching a dial at all. The stick-on strip sits apart entirely — it sacrifices precision for convenience, which suits casual users far more than anyone chasing competition-grade microfoam. Worth flagging early: none of these differences matter much if you don’t know the target temperature you’re steaming towards, which is exactly what the next few sections unpack.
💬 Just one click — help others make better buying decisions too!😊
Top 7 Milk Thermometers for Espresso: Expert Analysis
Coverage below spans budget, mid-range, and premium options, plus the increasingly popular stick-on strip format, so whatever your steaming style and jug size, there’s a realistic match. Every verdict here is built from real specifications and aggregated review themes — never a fabricated hands-on account.
1. Rhinowares Short Milk Thermometer — best budget dial for small pitchers
The Rhinowares Short (model RWTHERMS) is a 13cm stainless steel probe with a sliding stainless clip, and it’s the thermometer most UK coffee kit retailers point beginners towards first. At just 5 inches tall, it’s built specifically for smaller jugs — anything from 12oz to 20oz — where a longer probe would simply be overkill and awkward to angle.
The dial reads instantly and the clip’s “positive lock, quick-release” design means you can slide the probe up or down the stem to seat it just above the base of the pitcher, which matters because a probe reading is only accurate if it’s actually in the moving milk rather than near the surface. Based on the spec comparison with pricier rivals, what you’re sacrificing here isn’t accuracy — it’s reach; larger jugs will leave the tip well short of the milk’s centre.
We couldn’t verify a large independent review pool tied to this exact short-stem SKU, but aggregated Amazon feedback across Rhino’s clip-thermometer range consistently praises the sliding clip mechanism and ease of reading, while the recurring criticism is that shorter probes don’t suit jugs above 20oz — exactly the trade-off the spec sheet implies.
Pros:
- ✅ Compact size ideal for 12-20oz pitchers
- ✅ Slide-adjustable clip for precise probe depth
- ✅ Simple, battery-free, dial reads instantly
Cons:
- ❌ Too short for pitchers above 20oz
- ❌ Analogue dial needs periodic calibration
At around £10-£15, the Rhinowares Short represents strong value for anyone steaming single servings, and it’s a sensible first thermometer before you know whether you’ll ever need a bigger jug.
2. Rhinowares Long Stem Milk Thermometer — best for large pitchers and batch steaming
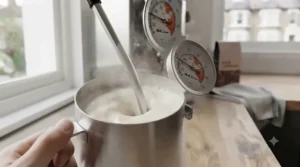
Step up to the Long Stem (RWTHERML) and you get an 18cm probe purpose-built for pitchers of 32oz and above — the size most households actually reach for once they’re steaming milk for two or three drinks in one go. The dial itself carries coloured zones: green from roughly 50°C to 65°C, red from 65°C to 75°C, with 60°C marked as the general target.
What that colour-coding means in practice is that you don’t need to memorise numbers mid-steam; you watch the needle sweep out of green and stop the wand the instant it touches the boundary. That’s a genuinely useful bit of design, because milk temperature climbs faster than most beginners expect in the final ten seconds, and a numeric-only dial demands more attention than most people can spare while also managing the steam wand angle.
Reviewers of similar long-probe clip thermometers frequently mention that the extra length makes it awkward to position in smaller jugs, where the tip can hit the base before the clip even engages properly — so this one is a genuine large-jug specialist, not a universal upgrade.
Pros:
- ✅ 18cm probe suits 32oz+ batch-steaming jugs
- ✅ Colour-coded green/red zones aid quick reading
- ✅ Sturdy clip holds securely during vigorous steaming
Cons:
- ❌ Overlong and awkward for smaller pitchers
- ❌ No numeric precision beyond the colour bands
Priced in the £15-£20 range, it’s a smart match for households or small offices steaming bigger batches rather than single cups.
3. Rhino Digital Milk Frothing Thermometer with Temperature Alert — best digital option with an audible alarm
This is the outlier in the line-up, and deliberately so. Instead of a dial, you get a digital display and — crucially — a temperature alert that sounds when your milk hits target, which means you can genuinely stop watching the pitcher and focus on wand angle and vortex technique instead.
That alert function changes the workflow more than the spec sheet lets on. Dial thermometers demand your eyes; this one demands your ears, freeing up attention that beginners badly need for the physical side of steaming. It’s also fully recalibratable, addressing the single biggest weakness of any thermometer: drift over time, especially after repeated exposure to steam and knocks against a stainless jug.
Reviewers of digital clip-and-alert milk thermometers in this category tend to flag two things repeatedly: how much faster it is to “set and forget” compared with a dial, and battery replacement as an ongoing (if minor) running cost that dial models simply don’t have.
Pros:
- ✅ Audible alert removes the need to watch constantly
- ✅ Digital readout removes dial-reading guesswork
- ✅ Recalibratable for long-term accuracy
Cons:
- ❌ Requires a battery, adding a running cost
- ❌ Pricier than any dial model in this list
At around £20-£30, this is the thermometer to buy once you already know you love making espresso drinks at home and want to remove the last bit of guesswork from the process.
4. Rhino Accutemp Milk Thermometer Sticker — best stick-on strip for hands-free monitoring
Here’s the format most people don’t know exists until they’ve already bought a probe thermometer and lost patience with it: an adhesive milk jug temperature strip that sticks directly to the outside of the pitcher and changes colour or displays a number as the milk heats, with no probe or clip involved whatsoever.
The appeal is obvious once you’ve used a probe thermometer that gets knocked sideways mid-steam, or a dial that fogs with condensation. A strip stays put, needs no positioning, and works on almost any metal jug regardless of size or shape, because it reads the external wall temperature rather than the milk’s centre directly. What most buyers overlook about strip thermometers is that external-wall reading, which means there’s a small lag and offset versus a true probe reading — usually a degree or two — that experienced users learn to account for.
Aggregated reviews on adhesive coffee temperature strips are broadly positive on convenience and near-unanimous that they’re the fastest option to glance at mid-steam, with the main criticism being that the adhesive can lose grip after repeated exposure to steam and cleaning over many months.
Pros:
- ✅ No probe or clip to position — just sticks on
- ✅ Fastest glance-and-go reading of any format
- ✅ Works on jugs of almost any shape or size
Cons:
- ❌ Reads jug wall temperature, not milk centre
- ❌ Adhesive can wear out after months of steam exposure
Usually sold in packs under £10, this is the cheapest way to get any temperature feedback at all, and a genuinely smart pairing for anyone who already owns a jug without a built-in gauge.
5. Westmark Milk Thermometer with Clip — best all-round mid-range dial
Westmark is a well-established German kitchenware brand, and its milk thermometer brings that heritage to the pitcher: an 18/8 stainless steel probe, a sliding clip that adapts to different jug heights, and coloured scale markings so you can read the desired zone without squinting at exact numbers.
Based on the spec comparison with own-brand budget alternatives, the 18/8 stainless grade (a food-safe alloy containing 18% chromium and 8% nickel) is a genuine step up in corrosion resistance, which matters more than it sounds for anything that spends its life dripping with hot milk and getting rinsed daily.
Aggregated Amazon UK reviews for this model are notably consistent: several reviewers specifically mention the stainless steel showing no rust or wear after months of daily use, and describe the coloured scale as making frothing “child’s play.” The one recurring gripe is that the clip could be slightly wider to grip larger pitchers securely — a minor complaint but a real one across multiple reviews.
Pros:
- ✅ 18/8 stainless steel resists rust long-term
- ✅ Coloured scale simplifies target-zone reading
- ✅ Adjustable clip fits multiple jug heights
Cons:
- ❌ Clip runs narrow for larger pitchers
- ❌ No numeric precision markings between zones
At roughly £12-£18, it sits comfortably as an everyday mid-range pick that outlasts cheaper own-brand dials without stepping into digital pricing.
6. Andrew James Milk Thermometer with Clip — best budget UK-brand pick for beginners
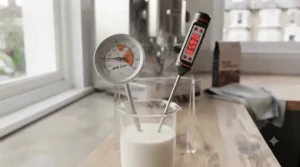
Andrew James is a familiar name on UK kitchen shelves, and its milk thermometer follows the expected clip-and-dial format: a stainless steel probe and clip, dual Celsius and Fahrenheit markings, designed specifically as a frothing-jug accessory rather than a general cooking thermometer repurposed for coffee.
The dual-scale dial is a small but genuinely useful touch for households where one person thinks in Celsius and another still reaches for Fahrenheit out of habit — you’re not forced to do mental conversion mid-steam, which is exactly the kind of moment where a slow conversion costs you the window between silky and scalded.
As a mainstream own-brand accessory, this model doesn’t carry the extensive review history of the market leaders, and honestly, that’s worth saying plainly rather than inventing sentiment that isn’t there. What can be verified is the spec: a genuine stainless probe and clip, dual-scale reading, and a price point that undercuts most specialist barista brands.
Pros:
- ✅ Dual Celsius/Fahrenheit dial avoids conversion
- ✅ Familiar, accessible UK homeware brand
- ✅ Competitively priced against specialist barista brands
Cons:
- ❌ Smaller independent review history than rivals
- ❌ Basic clip lacks Rhino’s slide-lock mechanism
Typically found under £12, this is a sensible low-risk entry point if you’re not yet sure how often you’ll actually reach for a milk thermometer.
7. Herreicher Barista Milk Thermometer — best precision dial for latte art perfectionists
Herreicher’s barista thermometer is built around a 125mm stainless probe paired with a large 45mm dial and claimed 0.5°C precision — noticeably finer graduation than the broad colour-zone dials most rivals use, and genuinely useful once you’re chasing consistent microfoam rather than just “hot enough.”
What that finer graduation means in practice: 0.5°C increments let you distinguish, say, 58°C from 60°C at a glance, which matters enormously for latte art, where cooler steaming (around 55-60°C) keeps the foam tighter and easier to pour into fine rosettas, while a broad colour band can’t tell you you’ve drifted two degrees warmer than intended. It’s also calibratable, so accuracy holds over repeated use.
Aggregated reviews of large-dial precision milk thermometers in this bracket tend to praise exactly this — the bigger, easier-to-read face and finer gradations — while a smaller subset of buyers note the large dial adds bulk that some find less pocketable for café use than a slimmer clip model.
Pros:
- ✅ 0.5°C precision beats broad colour-zone dials
- ✅ Large 45mm face is easy to read at a glance
- ✅ Calibratable for sustained long-term accuracy
Cons:
- ❌ Bulkier dial than slimline clip alternatives
- ❌ Smaller review pool than the market-leading brands
Sitting in the £15-£22 range, it’s the pick for anyone specifically chasing consistent latte art rather than just avoiding scalded milk.
Practical Usage Guide: Setting Up and Calibrating Your Milk Thermometer
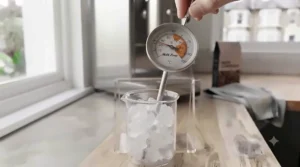
Getting a thermometer out of the box is the easy part; getting accurate, repeatable readings from it is where most people cut corners. Start with calibration, even on a brand-new unit — dial thermometers especially can arrive a degree or two off. The classic method is the ice-water test: submerge the probe tip in a glass of ice water (0°C) and adjust the dial’s calibration nut on the back until it reads zero. Repeat with boiling water (100°C at sea level) if your model allows a second calibration point.
Positioning matters just as much as calibration. Clip the thermometer to the pitcher before you pour in the milk, not after — this is the single most common first-30-days mistake, because trying to position a clip on a full, swirling jug mid-steam is exactly when thermometers get knocked into the steam wand. Seat the probe tip so it sits just above the base of the pitcher, in the milk’s path, not pressed against the metal wall, which reads jug temperature rather than milk temperature and lags behind reality.
Maintenance is minimal but not optional: rinse the probe immediately after each use before milk residue dries and bakes onto the stainless steel, and re-check calibration every few months, more often if you’re steaming daily. Store dial thermometers away from where they’ll get knocked — a dropped dial thermometer is the most common cause of drift, more so than age.
Real-World Scenarios: Which Milk Thermometer Actually Suits You?
Consider three fairly typical home setups. First, the solo flat-white drinker with a compact 12oz pitcher and a single-boiler machine, making one drink most mornings before work. Speed and simplicity beat precision here — the Rhinowares Short Milk Thermometer or the Rhino Accutemp Milk Thermometer Sticker both fit this life better than a fiddlier digital unit with an alarm nobody has time to wait for on a weekday commute.
Second, picture a family of four who all drink milky coffee, using a 32oz pitcher to batch-steam enough for everyone at once. Reach and colour-coded zones matter more than raw precision, which points squarely at the Rhinowares Long Stem Milk Thermometer — its 18cm probe was built for exactly this jug size, and the wide green zone forgives the inevitable distraction of a busy kitchen.
Third, the home barista chasing genuine latte art, practising rosettas and tulips on weekends and caring about repeatable, degree-level consistency between attempts. That’s the Herreicher Barista Milk Thermometer or the Rhino Digital Milk Frothing Thermometer, both offering the finer control that broad colour bands simply can’t provide — the difference between “roughly right” and “exactly repeatable” is the whole game once you’re pouring patterns rather than just filling a cup.
Milk Scalding Prevention: Common Mistakes and How to Avoid Them
Scalded milk isn’t just a flavour problem — it’s also, in the literal sense, a burns and food-safety issue, and it’s worth treating both angles seriously. On the flavour side, the most common mistake is simply steaming without any temperature reference at all, judging “done” by touching the outside of the jug with a bare hand. That method is notoriously unreliable because hand tolerance to heat varies hugely between people and even between mornings, and by the time a jug feels genuinely too hot to hold comfortably, the milk inside is very likely already well past 70°C and scalded.
A second common mistake is positioning the probe against the pitcher wall rather than in the moving milk, which produces a falsely low reading and leads to over-steaming as you chase a number that never quite arrives. Third, many beginners stop watching the dial the moment foam volume looks “enough,” forgetting that temperature keeps climbing for several seconds after you’d expect it to plateau, particularly with powerful home machines.
On the safety side, hot milk behaves like any other hot liquid: contact with skin at high temperature causes real scald injuries. The NHS guidance on burns and scalds advises cooling any scald under cool running water for a sustained period until the pain settles, as immediate first aid if an accident does happen. Keep steamed milk and the pitcher itself away from small children’s reach immediately after steaming — the outside of a jug that’s held 65°C milk stays genuinely hot for several minutes afterwards, longer than most people assume, and UK food-hygiene guidance on milk and milk products is a useful wider reference if you’re batch-steaming for a household rather than a single cup.
What Temperature to Steam Milk for Espresso?
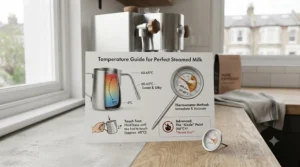
The widely cited target for steaming milk for espresso-based drinks sits between 55°C and 65°C (130-150°F), the range where lactose sweetness peaks and milk proteins create a stable, silky microfoam without scorching. Below this window the milk tastes flat and underdeveloped; above roughly 70°C, proteins denature too aggressively, foam collapses, and the flavour turns bitter and scalded.
Here’s why that particular window works, chemically speaking: milk contains natural sugars in the form of lactose, and this sugar becomes noticeably sweeter as milk warms through the 55-65°C range without needing any caramelisation or burning to occur. Push much past that and you’re not adding more sweetness beyond roughly 71°C, milk starts losing sweetness and can develop a distinctly burnt or scalded flavour instead, which is precisely why professional steaming guides treat 70°C as a hard ceiling rather than a soft suggestion.
Plant-based milks complicate the picture slightly. Oat milk performs closest to dairy but curdles more readily if pushed too hot, so most guidance suggests steaming it a touch cooler, around 55-60°C, to keep texture smooth. Almond and soy behave similarly — lower protein content than dairy means less margin for error, so a thermometer arguably matters more for alternative milks than for whole dairy, not less.
How to Choose a Milk Thermometer for Espresso
- Match probe length to your jug size. A 13cm probe suits small 12-20oz pitchers; anything above 32oz needs an 18cm-plus probe to actually reach the milk’s centre rather than skimming the surface.
- Decide between dial, digital, and strip formats. Dials need no batteries and rarely fail outright; digital models add an audible alert but introduce a battery to maintain; strips are fastest to glance at but read jug-wall temperature rather than milk temperature directly.
- Check for colour-coded zones if you’re a beginner. A green-to-red visual band is far easier to react to mid-steam than a small numeric scale, especially while you’re still learning wand angle and vortex technique simultaneously.
- Prioritise calibratable models. Any analogue dial will drift eventually with knocks and steam exposure; a recalibration point (usually an ice-water test) keeps accuracy honest over years rather than months.
- Consider the clip mechanism, not just the dial. A loose or narrow clip that slips off the pitcher mid-steam is a more common real-world annoyance than any dial-accuracy issue reviewers report.
- Weigh precision against your actual goal. Chasing latte art specifically justifies a 0.5°C precision dial like the Herreicher; casual daily flat whites genuinely don’t need graduation that fine.
- Factor in stainless steel grade. 18/8-grade stainless resists corrosion meaningfully better than unspecified “stainless steel” over years of daily rinsing — worth checking the listing specifics before buying.
✨ Ready to Steam Like a Pro?
🔍 Compare the seven picks above side by side, click through to check current pricing and availability, and get a genuinely accurate read on your next flat white. Small tool, noticeably better coffee.
Milk Thermometer vs Built-In Steam Wand Gauges
Some higher-end home espresso machines ship with a built-in temperature gauge on the boiler or steam wand assembly, which raises an obvious question: why buy a separate milk thermometer at all? The honest answer is that these two things measure fundamentally different temperatures. A boiler or steam-wand gauge reports the temperature of the steam or the machine’s internal system — useful for confirming the machine has reached operating temperature, but it tells you nothing about what’s actually happening inside your pitcher.
Milk temperature depends on jug size, milk volume, ambient kitchen temperature, and steaming technique, none of which a fixed machine gauge can account for. Two people using the identical machine with the same steam pressure can produce 55°C milk and 75°C milk in the same thirty seconds, purely based on jug size and wand angle — the machine’s own gauge would read identically for both. That’s the practical case for a dedicated milk thermometer even on machines that already display a number somewhere on the housing: it measures the thing you actually care about, not a proxy for it.
Barista Temperature Control for Different Milk Types
Barista temperature control isn’t one-size-fits-all once you move beyond standard whole dairy milk. Whole milk is genuinely the most forgiving option, tolerating the full 55-65°C range comfortably thanks to its fat and protein structure, which is exactly why it remains the standard training ground for anyone learning to read a thermometer under pressure.
Oat milk behaves impressively close to dairy in foam quality but is noticeably less heat-tolerant; steaming a touch cooler, in the 55-60°C band, keeps its texture from curdling or separating. Almond and soy milks carry even less structural margin, thanks to lower protein content, so a thermometer stops being a nice-to-have and becomes close to essential — without one, the window between “not steamed enough” and “visibly split” on plant milk can be a matter of just a few degrees, far narrower than most beginners expect coming from dairy.
Semi-skimmed and skimmed dairy milks sit somewhere in between: they froth more easily than whole milk thanks to lower fat content, but that same lower fat gives less structural stability to the resulting foam, meaning slightly more attentive temperature control near the top of the range pays off in a noticeably longer-lasting microfoam.
Milk Jug Temperature Strip vs Dial and Digital Thermometers: Features That Actually Matter
It’s worth being blunt about what genuinely changes your coffee and what’s mostly marketing polish. A milk jug temperature strip’s biggest real advantage is convenience — nothing to position, nothing to knock loose mid-steam, and a genuinely fast glance-and-go reading that suits people who’ve already decided they’re not going to fuss over exact degrees. What doesn’t matter nearly as much as it sounds: strip colour-change speed, since the lag versus true milk-centre temperature (typically a degree or two, from reading jug-wall heat rather than the milk itself) matters more to your actual result than how quickly the colour shifts.
For dial thermometers, the feature that actually matters is probe length matched correctly to jug size — everything else is comparatively minor. Dial precision (broad colour zones versus fine 0.5°C graduations) matters far more for latte art practice than for a daily flat white, where “somewhere in the green zone” is genuinely good enough. For digital models, the audible alert is the standout practical feature; the exact display resolution (whole degrees versus half-degrees) makes little audible or tasteable difference in the final cup.
What doesn’t matter, frankly: dial size for its own sake, colour of the clip, and branding. What does: probe length versus jug size, a securely gripping clip, and — for dials specifically — a genuine calibration point rather than a sealed, non-adjustable unit.
Long-Term Cost and Maintenance of Your Milk Thermometer
Total cost of ownership on a milk thermometer is refreshingly low compared with most espresso accessories, but it isn’t zero, and it’s worth being upfront about where the ongoing costs actually sit. A dial thermometer, once bought, has essentially no running cost — no batteries, no consumables — and a well-maintained stainless model can realistically last many years if it’s rinsed after each use and not repeatedly dropped.
Digital models introduce one clear ongoing cost: batteries. It’s minor in absolute terms, typically a coin-cell replacement every several months of regular use, but it’s worth factoring against the dial alternative if minimising running costs matters to you. Stick-on strips have the shortest realistic lifespan of the three formats, since adhesive wears with repeated steam and cleaning exposure over months, effectively making them a semi-consumable rather than a genuine one-off purchase — worth knowing before you compare their lower upfront price directly against a £15 dial thermometer that might outlast it several times over.
Cost-per-use, then, tends to favour dial thermometers over a multi-year horizon, digital models add a small but real ongoing cost for genuinely more convenience, and strips are cheapest upfront but the most likely to need periodic replacement.
Frequently Asked Questions
❓ What is the best temperature to steam milk for espresso drinks?
❓ Do I really need a milk thermometer, or can I judge by touch?
❓ Are milk jug temperature strips as accurate as clip-on thermometers?
❓ How do I calibrate a dial milk thermometer?
❓ What temperature should plant-based milks be steamed to?
Conclusion
A milk thermometer for espresso is one of those small, unglamorous purchases that quietly changes your entire coffee routine once you’ve used one properly. Whether you land on the budget-friendly Rhinowares Short Milk Thermometer, the batch-friendly Rhinowares Long Stem Milk Thermometer, the set-and-forget Rhino Digital Milk Frothing Thermometer, the grab-and-glance Rhino Accutemp Milk Thermometer Sticker, the dependable Westmark Milk Thermometer, the wallet-friendly Andrew James Milk Thermometer, or the precision-focused Herreicher Barista Milk Thermometer, the underlying win is the same: consistency you can actually repeat tomorrow morning, rather than a lucky guess you can’t quite recreate.
The 55-65°C window isn’t arbitrary — it’s the genuine chemistry of lactose sweetness and protein structure working in your favour, and it’s also a firm line against scalding both your milk and, if you’re careless with a freshly steamed jug, your skin. Pick a thermometer that matches your actual jug size and your actual patience for precision, calibrate it properly, and the leap from “drinkable” to “genuinely café-quality” milk happens far faster than most people expect.
Recommended for You
- Stainless Steel Milk Pitcher: 7 Best Picks for UK Baristas (2026)
- Best Barista Milk Pitcher for Latte Art: 7 Top Picks for 2026
- Best Milk Pitcher 2026: 7 Top Picks Every UK Barista Rates
Disclaimer: This article contains affiliate links. As an Amazon Associate, I earn from qualifying purchases. If you purchase products through these links, we may earn a small commission at no additional cost to you.
✨ Found this helpful? Share it with your friends! 💬🤗
