
In This Article
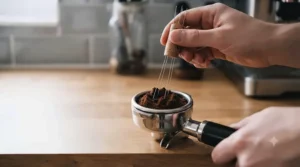
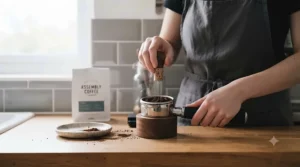
Somewhere between your grinder and your portafilter sits a decision that quietly wrecks more shots than a dodgy tamp ever could: clumpy, unevenly distributed grounds. This is where the DIY WDT tool vs buying one debate actually starts to matter, because both routes solve the same problem — coffee clumping into dense little pebbles that water either barrels straight through or refuses to touch. A WDT (Weiss Distribution Technique) tool is a handheld stirrer, usually a bundle of very fine needles set into a handle, used to break up those clumps and rake the grounds into an even bed before tamping. That’s the whole definition in one breath, and yet it’s the single cheapest upgrade most home setups never make.
We’re not here to just repeat spec sheets from Amazon listings — Amazon’s own Associates guidelines actually forbid that sort of thin content these days, and frankly it wouldn’t help you anyway. Instead, this guide digs into seven real, currently available WDT tools spanning budget aluminium stirrers to premium retractable-needle designs, compares them against building your own from acupuncture needles and a cork, and gives you honest, spec-grounded analysis on which route suits your kitchen counter, your patience level, and your wallet. Whether you’re a full-time home barista DIY tinkerer or someone who just wants the thing to arrive pre-built and ready to use, you’ll find a clear answer here — with the reasoning shown, not just the verdict.
Quick Comparison Table
| Tool | Type | Needle Count | Price Range | Best For |
|---|---|---|---|---|
| MICXNIC WDT Tool | Bought | 7 (0.3mm) | Under £15 | First-timers on a tight budget |
| IKAPE WDT Tool with Stand | Bought | 6+6 (dual size) | £15-£20 range | Tuning needle feel to your grind |
| MHW-3BOMBER Lightning 2.0 | Bought | 8 (0.4mm) | £25-£35 range | Durability and tidy storage |
| Normcore WDT Distribution Tool V3 | Bought | 9 (dual size) | £30-£40 range | Trusted all-round performance |
| AIEVE Spirographic WDT Tool | Bought | 9 (0.4mm) | £15-£25 range | Hands that get tired mid-stir |
| Subminimal Flick WDT Tool | Bought | Retractable | £25-£35 range | One-handed, premium daily use |
| Acupuncture Needle DIY Build | DIY | 8-12 (0.20-0.35mm) | Under £10 | Home barista DIY on a shoestring |
Looking at the spread above, the gap between the cheapest bought tool and a homemade acupuncture-needle build is smaller than most people assume — both sit comfortably under £15. What separates them is time and finish quality: the MICXNIC WDT Tool arrives ready to use in the box, while the DIY acupuncture-needle build asks you to source needles, drill or heat a handle, and accept a rougher first attempt. Meanwhile, the mid-range and premium options from Normcore and Subminimal justify their higher price with better ergonomics and needle durability rather than any dramatic leap in extraction quality.
💬 Just one click — help others make better buying decisions too!😊
Top 7 WDT Tools: Expert Analysis
Before diving into individual write-ups, here’s how all seven stack up on the numbers that actually change how they feel in your hand and how long they’ll last.
1. MICXNIC WDT Tool — best budget pick for first-timers
The standout here is simple: it’s cheap, it works, and it comes with everything you need to start distributing properly on day one. The MICXNIC WDT Tool ships with seven 0.3mm stainless steel needles set into a screw-off aluminium handle, along with a small stand and three spare needles for when one inevitably bends. That needle gauge sits right in the sweet spot recommended across most puck-prep guides — thin enough to slice through clumps without dragging half the bed sideways with it.
Based on the spec comparison with pricier rivals, what most buyers overlook is that the fundamentals of WDT don’t actually require exotic materials; a 0.3mm needle does the same job whether it costs £8 or £35. This tool is for beginners testing whether WDT even suits their workflow, or anyone replacing a lost or bent needle set without wanting to reinvest in a premium body. Aggregated review sentiment on Amazon UK is broadly positive, with reviewers consistently reporting a noticeably more even flow after switching from no distribution tool at all, though a handful flag that the screw-off cap can work loose with heavy daily use.
Pros:
- ✅ Genuinely low entry price for a complete kit
- ✅ Includes stand and spare needles out of the box
- ✅ 0.3mm needles suit most home espresso grinds
Cons:
- ❌ Screw cap can loosen with frequent daily use
- ❌ Handle finish feels basic next to premium rivals
Priced under £15, this is straightforward value — buy it, use it, replace it in a year or two without any guilt.
2. IKAPE WDT Tool with Stand — dual needle sizes for tuning grind feel
What makes the IKAPE WDT Tool with Stand worth a second look is the pairing of two interchangeable needle sets, 0.25mm and 0.4mm, in the same handle. That’s not a gimmick: finer needles suit ultra-fine espresso grinds without over-disturbing the bed, while the thicker set clears out stubbornly clumpy grounds from home grinders that struggle at finer settings.
The tool unscrews at the handle head for a quick needle swap, and the stand doubles as a small collection tray so stray grounds don’t end up all over your counter. This is a strong pick for buyers still dialling in a new grinder, since you can experiment with needle thickness rather than committing to one gauge for good. Reviewers on the manufacturer’s own listing and third-party retailers report the dual-needle system genuinely gets used, rather than sitting in a drawer — a common fate for accessories that promise flexibility but deliver friction.
Pros:
- ✅ Two needle gauges cover fine and coarse grinds
- ✅ Stand doubles as a tidy ground-catching tray
- ✅ Easy unscrew-and-swap needle mechanism
Cons:
- ❌ Needle-swap threads can strip if over-tightened
- ❌ No magnetic mount, so storage is less tidy
In the £15-£20 range, this earns its place for anyone still experimenting with grind settings.
3. MHW-3BOMBER Lightning Needle Distributor 2.0 — sturdiest magnetic-stand build
The magnetic stand is the headline feature, and it’s a genuinely practical one: WDT needles bend far more often from being knocked off a countertop than from actual use, and a magnetic dock solves that at a stroke. The MHW-3BOMBER Lightning Needle Distributor 2.0 pairs this with an adjustable-range needle head, letting you rotate the component to widen or narrow the needle spread for different portafilter diameters between 51mm and 58mm.
Built from SUS304 stainless steel and aluminium alloy, this tool is aimed at buyers who want something that survives years of daily grinding rather than a seasonal experiment. The eight 0.4mm needles are on the thicker end of the WDT spectrum, which the spec sheet won’t spell out but user reports suggest works particularly well against dense, oily dark-roast grounds that gum up finer needles. Aggregated feedback across retailer listings consistently praises the magnetic storage and the solid, weighty feel in hand, with the main recurring criticism being that the adjustable mechanism takes a session or two to get used to.
Pros:
- ✅ Magnetic stand prevents accidental needle damage
- ✅ Adjustable range fits 51mm to 58mm baskets
- ✅ SUS304 steel needles resist oxidation long-term
Cons:
- ❌ Adjustable mechanism has a slight learning curve
- ❌ Heavier than simpler fixed-needle alternatives
Sitting in the £25-£35 range, it’s a sensible mid-tier buy for anyone who wants their gear to last.
4. Normcore WDT Distribution Tool V3 — most trusted all-rounder
Normcore has become something of a default recommendation in home-barista circles, and the V3 explains why. It ships with two full sets of needles — nine at 0.25mm and nine at 0.3mm — so you get the same flexibility as the IKAPE model but with a CNC-machined anodised aluminium body that feels noticeably more refined in hand. The design borrows its ergonomics from Normcore’s own V4 tamper handle, so if you already own their tamping gear, the grip will feel immediately familiar.
Here’s what to weigh: the V3’s needles install without unfastening the whole handle, which sounds minor until you’ve fought a stuck screw thread at 6am before work. This tool suits buyers who’ve already invested in other Normcore accessories, or anyone who wants a distribution tool that will comfortably outlast several grinders. Reviewer sentiment aggregated from Amazon and specialty retailers is consistently strong, with the padded stand base and interchangeable needle sizing singled out most often; the recurring niggle is that the walnut-handle variant costs noticeably more than the standard black finish for what is functionally the same tool.
Pros:
- ✅ Two needle gauges included as standard
- ✅ Refined CNC-machined aluminium construction
- ✅ Padded stand protects your countertop surface
Cons:
- ❌ Walnut finish carries a real price premium
- ❌ Replacement needles aren’t cheap if lost
In the £30-£40 range, this is the tool most likely to satisfy a fussy home barista for years.
5. AIEVE Spirographic WDT Tool — spinning action for lazy stirrers
Manual WDT stirring is a small motion repeated many times a week, and the AIEVE Spirographic WDT Tool turns that motion into a press-and-spin gesture instead. A geared mechanism inside the aluminium body converts a light downward push into a spinning needle rotation, distributing grounds without the wrist-circling technique that some newcomers find fiddly to learn.
The nine 0.4mm needles are mounted on a heavy-duty stand, and the spinning action genuinely does spread grounds more evenly across a wider radius than a straight up-and-down poke, particularly useful for the wider 58mm baskets found on many prosumer machines. Based on the spec comparison with static designs, what most buyers overlook is that gear-driven tools like this trade a small amount of tactile control for consistency — you’ll get a similar result shot after shot with less technique-dependent variation, which matters more for a shared household machine than for a solo perfectionist chasing a very specific stir pattern.
Pros:
- ✅ Spring-and-spin action needs less wrist technique
- ✅ Wide 58mm coverage suits prosumer portafilters
- ✅ Heavy-duty stand keeps the tool upright
Cons:
- ❌ Gear mechanism adds moving parts that can wear
- ❌ Less tactile feedback than a plain needle stir
Priced in the £15-£25 range, this suits anyone who wants consistency without fussing over technique.
6. Subminimal Flick WDT Tool — most satisfying one-handed action
This is the tool that home-barista forums keep circling back to, and the retractable mechanism is the reason why. Push the top of the Subminimal Flick WDT Tool and the needles pop out ready to stir; release it and a flick of the wrist sends them straight back inside the pen-shaped body, protecting the fine tips from the bent-needle fate that plagues cheaper exposed designs. A magnetic wall mount keeps it parked on your grinder rather than rolling around a drawer.
What the spec sheet won’t tell you, but aggregated reviewer sentiment consistently notes, is that the retraction habit genuinely changes how often people bother distributing at all — a tool that’s satisfying and quick to use gets used every single shot, where a fiddly one gets skipped on rushed mornings. This is the pick for buyers who’ve already tried a cheaper WDT tool, bent a needle or two, and are ready to pay for engineering that solves that specific annoyance. The trade-off is straightforward: you’re paying a genuine premium for mechanism and materials rather than any dramatic leap in extraction outcome versus a well-made static tool.
Pros:
- ✅ Retractable needles avoid bending in storage
- ✅ One-handed push-and-flick operation is quick
- ✅ Magnetic wall mount keeps it always to hand
Cons:
- ❌ Noticeably pricier than static alternatives
- ❌ Retraction mechanism adds long-term wear points
Sitting in the £25-£35 range, this is the premium choice for daily espresso accessories value seekers who use their machine every single day.
7. Seirin-Type Acupuncture Needles (DIY Route) — cheapest real upgrade going
This entry represents the DIY path rather than a single boxed product, and it deserves its place on this list because it’s genuinely how the WDT technique began. John Weiss, who developed the method in the early 2000s, originally used dissection needles manipulated by hand, and hobbyists since have used everything from sewing needles to paperclips before settling on ultra-fine acupuncture needles as the sweet spot for thinness and stiffness. A box of 0.20mm to 0.35mm disposable acupuncture needles, widely available and typically sold in packs of 50-100, costs a fraction of any assembled tool.
Building your own homemade WDT tool espresso setup usually means pushing three to eight needles through a wine cork or a small block of wood, gluing them in place, and trimming to length — a project that takes perhaps twenty minutes and a tube of superglue. Reviewer sentiment gathered from coffee forums is consistently positive on the stirring performance itself, since the needle gauge is often finer than anything in a boxed tool, but just as consistently notes that homemade handles feel less secure and needles are more prone to working loose without professional-grade epoxy or a proper resting stand.
Pros:
- ✅ Needle cost is a fraction of any bought tool
- ✅ Ultra-fine gauge rivals premium bought needles
- ✅ Fully customisable needle count and spacing
Cons:
- ❌ No stand, so storage safety is on you
- ❌ Handle security depends entirely on your build
At under £10 for a needle pack plus a cork you already own, this is the true budget floor of the DIY WDT tool vs buying one decision.
How to Build a Homemade WDT Tool
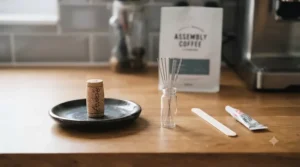
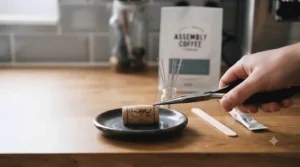
If you’ve decided the DIY route suits your budget better than a boxed tool, here’s the practical version rather than a vague suggestion to “just make one.” Start with a natural wine cork or a small offcut of dense wood — softwood splits too easily around the needle holes. Using a pin vice or a fine drill bit slightly narrower than your needle gauge, drill somewhere between six and twelve holes in a rough circle across the cork’s flat face, spaced roughly 5-6mm apart so the needles cover a useful spread without crowding.
Insert your acupuncture needles one at a time, adding a small drop of cyanoacrylate (superglue) or epoxy into each hole before pushing the needle home, and leave the assembly to cure fully — rushing this step is the single most common cause of loose needles later. Trim any needles that protrude further than around 15-20mm below the cork, since you only need enough length to reach the bottom of your basket, not skewer through it. Once cured, test the tool gently on dry grounds before your first real shot, checking that no needle wobbles or pulls free under light pressure.
Store the finished tool needle-down in a small glass or a dedicated stand rather than loose in a drawer, both to protect the tips and, frankly, to avoid finding it the hard way with your fingers. This entire homemade WDT tool espresso build costs under a tenner in materials and, done properly, performs on par with tools costing three or four times as much — the main thing you’re trading away is the polish and safety of a proper stand.
Real-World Scenarios: Which Route Suits You?
The barista on a budget. You’re making one or two shots a day, you’ve just bought your first proper espresso machine, and every pound matters after that outlay. A sub-£15 bought tool like the MICXNIC WDT Tool, or a homemade acupuncture-needle build costing even less, gets you 90% of the benefit for a fraction of the spend of premium options — there’s no reason to stretch further at this stage.
The daily obsessive. You pull two to four shots every single day, you’ve already upgraded your grinder, and small frustrations genuinely bother you over a long enough timeline. This is where the Subminimal Flick WDT Tool or Normcore WDT Distribution Tool V3 earn their higher price — you’ll use them often enough that the better ergonomics and needle protection pay for themselves in reduced annoyance, if not in pure extraction quality.
The tinkerer who enjoys the process. Some home baristas genuinely enjoy building their own gear as much as drinking the coffee it makes. If that’s you, the acupuncture-needle DIY route isn’t really about saving money at all — it’s a satisfying small project, and the resulting tool can be tuned to your exact preferred needle count and gauge in a way no boxed product allows.
✨ Don’t Miss These Exclusive Deals!
🔍 Take your espresso setup to the next level with these carefully selected WDT tools. Click on any highlighted pick to check current pricing and availability, and start pulling more consistent shots today!
Common WDT Problems and How to Fix Them
Problem: needles keep bending or snapping. This is almost always caused by pressing too hard or storing the tool loose in a drawer where it takes knocks. Switch to a lighter stirring pressure — the needles only need to break up density, not stab through the puck — and store the tool tip-up in a stand or magnetic dock like those included with the MHW-3BOMBER Lightning Needle Distributor 2.0 or Subminimal Flick WDT Tool.
Problem: coffee still channels after distributing. Distribution alone won’t fix channeling caused by uneven tamping or a poorly fitting basket. Pair your WDT routine with a level tamp and check your dose isn’t sitting proud of or below the basket rim; the tool prepares the bed, but tamping technique still finishes the job.
Problem: grounds stick to the needles and won’t release. Static build-up is common with very fine, very dry grounds, particularly with light roasts. A quick tap of the handle against the portafilter edge after stirring, or lightly dampening your fingertip before dosing to reduce static, both help.
Problem: homemade tool needles keep working loose. This traces back to insufficient glue or curing time during the build. Rebuild with a proper two-part epoxy rather than a quick-drying superglue, and leave it a full 24 hours before use — patience here saves needles ending up in your espresso.
Problem: unsure which needle gauge to buy or build with. As a rule of thumb, finer needles around 0.2-0.3mm suit finer, more clump-prone espresso grinds, while 0.4mm needles handle coarser, chunkier grounds from budget home grinders without over-agitating the bed.
How to Choose a WDT Tool
What is a WDT tool? A WDT tool is a handheld device — typically fine needles set into a handle — used to stir espresso grounds in the portafilter before tamping, breaking up clumps for more even extraction and reduced channeling.
- Check the needle gauge first. Anywhere from 0.2mm to 0.4mm works, but match it loosely to your grind: finer needles for finer, clumpier grinds; thicker needles for coarser home-grinder output.
- Decide if you need a stand. A stand or magnetic dock, like those on the Normcore WDT Distribution Tool V3 and MHW-3BOMBER Lightning Needle Distributor 2.0, protects needles between uses and keeps your counter tidy.
- Consider portafilter compatibility. Most tools cover 51-58mm, but wider commercial baskets may need a specific model or an adjustable-range design.
- Weigh the ergonomics honestly. A tool you find genuinely pleasant to hold, like the Subminimal Flick WDT Tool‘s retractable design, gets used every day; a fiddly one gets skipped on rushed mornings.
- Factor in replacement costs. Bent needles happen. Check whether spares are included or sold separately before committing to a brand.
- Set a realistic budget. There’s little functional gap between a £10 tool and a £35 one for the core stirring job — the difference is durability, feel, and storage convenience.
- Ask whether DIY genuinely appeals. If you enjoy small workshop projects, building your own from acupuncture needles is a legitimate, well-documented path used since John Weiss’s original technique, as detailed in Barista Hustle’s explainer on the method.
DIY WDT Tool vs Buying One: The Full Comparison
This is the question this whole guide exists to answer honestly, and the truthful verdict is that it’s closer than most enthusiast forums admit. A DIY WDT tool vs buying one decision really comes down to three factors: upfront cost, time investment, and how much you value finish and storage safety over raw savings.
| Factor | DIY Build | Bought Tool |
|---|---|---|
| Upfront cost | Under £10 in materials | £10-£40 depending on model |
| Time to first use | 20-40 minutes plus glue curing | Ready immediately on arrival |
| Needle protection | None unless you build a stand | Often included (stand or magnetic) |
| Customisation | Full control over gauge and count | Fixed by manufacturer |
| Consistency of finish | Varies with your DIY skill | Reliable, factory-made |
The table makes the trade-off plain: the acupuncture needle DIY build wins decisively on raw cost and customisation, letting you set your own needle gauge and count exactly to preference, while a bought tool like the Normcore WDT Distribution Tool V3 wins on convenience, needle protection, and consistent finish straight out of the box. Neither route produces meaningfully worse coffee than the other once built or bought correctly — the real difference is whether you’d rather spend twenty minutes with a glue gun or a few extra pounds for something ready to use tonight.
Where this gets interesting for a genuine home barista DIY enthusiast is the middle ground: nothing stops you building a rough homemade version to test whether WDT suits your routine at all, then upgrading to a bought tool like the MHW-3BOMBER Lightning Needle Distributor 2.0 once you know you’ll use it daily. That staged approach avoids spending on a premium tool before confirming the technique earns a permanent spot in your workflow.
What to Expect: Real-World Performance
On paper, every tool on this list breaks up clumps. In practice, the differences show up in small, cumulative ways across a week of daily shots. With a properly used WDT tool — bought or homemade — you’ll typically notice fewer of the thin, fast “blonde” spurts from a bottomless portafilter that signal channeling, and a more even, syrup-like flow across the full extraction window rather than an early gush followed by a slow drip.
Taste-wise, reviewers and coffee forums consistently describe the change as more clarity and sweetness with fewer sour or bitter notes muddying the cup, which lines up with the underlying physics: an evenly resistant coffee bed forces water through all the grounds at roughly the same rate, rather than racing through weak spots and barely touching the rest. What WDT won’t fix is a genuinely wrong grind setting or a stale bag of beans — it’s a puck-prep refinement, not a cure-all, and expecting it to rescue fundamentally flawed inputs will only lead to disappointment.
Features That Actually Matter (And Those That Don’t)
Needle gauge and a secure, wobble-free handle genuinely matter — everything else on a WDT tool’s spec sheet is largely marketing polish. A magnetic stand is a nice-to-have that prevents bent needles, but it doesn’t change extraction outcomes; a £2 jam jar does the same protective job for a homemade build. Adjustable needle spread, as seen on the MHW-3BOMBER Lightning Needle Distributor 2.0, matters if you own multiple portafilter sizes, but it’s irrelevant if your machine only ever takes one basket diameter.
Retractable mechanisms, like the one on the Subminimal Flick WDT Tool, are a genuine ergonomic upgrade rather than hype — they solve the real, common problem of bent needles in storage. Fancy handle materials such as walnut, by contrast, add cost without adding function; they’re a legitimate aesthetic choice for your counter, but don’t let marketing copy convince you they improve your coffee. Focus your budget on needle quality and a storage solution, and treat the rest as optional polish.
Is a WDT Tool Worth Buying? The Honest Verdict
Yes, for the vast majority of home baristas — but the honest caveat is that the technique matters more than the tool. Is a WDT tool worth buying over simply using a paperclip or a cheap whisk? Based on the spec comparison and aggregated forum sentiment across this guide, a purpose-built tool with genuinely fine, straight needles consistently outperforms improvised alternatives, since blunt or looped ends tend to create new clumps rather than clearing existing ones.
Where it stops being worth buying is if you rarely make espresso, or if your grinder already produces exceptionally clump-free output — some higher-end grinders genuinely reduce the need for aggressive WDT stirring. For everyone else, even the cheapest £10 option on this list, or a homemade equivalent, delivers a noticeably more even puck for a trivial cost relative to the machine and grinder you’ve likely already invested in. It’s one of the very few espresso accessories value additions where the price-to-benefit ratio is almost embarrassingly favourable.
Long-Term Cost & Maintenance
A WDT tool is refreshingly cheap to own over time compared with almost anything else in an espresso setup. Needles occasionally bend or snap with heavy daily use, but replacement needle packs for models like the Normcore WDT Distribution Tool V3 typically cost a few pounds and last many months even with a bent needle or two swapped out along the way. A homemade tool costs even less to maintain — a fresh box of acupuncture needles runs to a few pounds and can rebuild several tools’ worth of stirring points.
Thinking in terms of total cost of ownership, a £30 bought tool used daily for three years works out to roughly two or three pence per shot once amortised, which is negligible next to the cost of beans, water filtration, or machine descaling. Compare that against the alternative of persistent channeling-related bean waste from unprepared pucks — a genuinely uneven shot often gets binned or drunk reluctantly — and the espresso accessories value case for owning any WDT tool, bought or built, is one of the clearest in the whole home-barista kit list. For further buying context on the wider espresso ecosystem this sits within, Which?’s independent espresso machine testing is a useful reference point for where a WDT tool fits relative to bigger-ticket kit.
WDT Tool Safety: Handling Fine Needles at Home
However cheap and small they are, WDT needles are genuinely sharp, and a homemade acupuncture-needle build in particular deserves the same basic respect you’d give any fine sharp instrument in a home kitchen. Always store a WDT tool needle-down or tip-protected, whether that’s a proper stand, a magnetic dock, or simply a jam jar kept out of a shared drawer where fingers reach in blind.
If you do sustain a prick from a WDT needle, treat it as you would any minor sharp-object injury: encourage the wound to bleed briefly under running water, clean it, and cover it. General guidance on safely handling and storing fine needles, including basic first-aid principles after a prick, is set out by the UK’s Health and Safety Executive, and while that guidance is written for clinical settings, the core storage and handling principles translate sensibly to a kitchen counter. Keep any spare or discarded acupuncture needles from a DIY build in a rigid, sealed container rather than loose in general waste, and never leave a finished tool needle-up where a child or a distracted housemate might brush against it.
Frequently Asked Questions
❓ Is a homemade WDT tool as good as a bought one?
❓ What needles are best for a DIY WDT tool?
❓ How much does a decent WDT tool cost in the UK?
❓ Do I need a WDT tool if I have an expensive grinder?
❓ Can a WDT tool damage my portafilter basket?
Conclusion
The DIY WDT tool vs buying one question doesn’t really have a universally “correct” answer — it has a correct answer for you, based on how much you enjoy small workshop projects, how often you actually pull shots, and how much you value a tidy magnetic stand over a few pounds saved. For an occasional home espresso drinker, a sub-£15 bought tool or a homemade acupuncture-needle build both deliver the same core benefit: fewer clumps, less channeling, and a noticeably cleaner-tasting shot. For the daily obsessive, stepping up to something like the Normcore WDT Distribution Tool V3 or Subminimal Flick WDT Tool buys genuine day-to-day convenience that a bare-bones build can’t quite match.
What matters far more than which of the seven options you choose is simply that you use one consistently. WDT is one of the rare espresso upgrades where a trivial spend, or even no spend at all beyond a cork and a needle pack, produces an outsized improvement in your daily cup. Whichever route you land on, treat the needles with a bit of care, store them properly, and let your next shot show the difference.
✨ Don’t Miss These Exclusive Deals!
🔍 Ready to sort your puck prep once and for all? Check current pricing on today’s top-rated WDT tools and start pulling more even, consistent espresso from your very next shot.
Recommended for You
- WDT Tool for Clumping Coffee: 7 Best Picks for 2026 (No More Channeling)
- Best WDT Tool 2026: 7 Top Espresso Distribution Tools UK
- Distribution Tool vs WDT Tool Espresso: 7 Picks Tested 2026
Disclaimer: This article contains affiliate links. As an Amazon Associate, I earn from qualifying purchases. If you purchase products through these links, we may earn a small commission at no additional cost to you.
✨ Found this helpful? Share it with your friends! 💬🤗
