

In This Article
A WDT tool is a small handle fitted with several very fine needles, used to stir ground coffee inside a portafilter basket before tamping, breaking up clumps and evening out the density of the coffee bed so water extracts through it uniformly. If you’ve ever pulled a shot that gushed out one side of a bottomless portafilter while the other side barely dripped, you’ve met the exact problem this tiny tool was invented to solve.
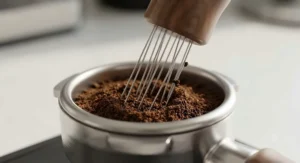
The technique behind it — the Weiss Distribution Technique — has a properly unglamorous origin story. It started with a single dissection needle and a coffee forum post, and it’s since become one of the cheapest, most talked-about upgrades in home espresso, right up there with switching to a better grinder. As Wikipedia’s overview of espresso preparation explains, extraction quality hinges heavily on how evenly water moves through the coffee bed — and that’s precisely what a good distribution tool is built to control.
This guide reviews seven real WDT tools currently sold on Amazon UK, spanning honest budget picks through to premium retractable-needle designs. We’ll get into needle thickness, build materials, genuine buyer feedback where it exists, and the wider mechanics of puck prep — clumping, channeling, and where a stirring tool fits alongside a leveler or a decent tamp. Every price below is a range, not a snapshot, because listings shift constantly — always check the current figure before buying.
Quick Comparison Table
| Tool | Needles | Material | Standout Feature | Best For |
|---|---|---|---|---|
| Normcore WDT Tool V3 | 9 (dual thickness sets) | Anodized aluminium | Interchangeable needle sets | All-round precision |
| Subminimal Flick WDT Tool | Retractable set | Metal/pen-style body | Click-in, click-out needles | Safety-conscious buyers |
| MHW-3BOMBER WDT Tool 2.0 | 8, 0.4mm | Aluminium alloy | Magnetic stand, adjustable width | Desk/bar storage |
| IKAPE Mantis WDT Tool | 8, 0.4mm | Walnut + aluminium | Dosing funnel built into stand | Style-conscious baristas |
| MEION WDT Espresso Distribution Tool | 7, 0.35mm | Aluminium alloy | Proven budget performer | Best value |
| Aotfusd WDT Tool | 7, 0.3mm (+10 spares) | Aluminium alloy | 17 needles total in the box | Long-term spares supply |
| AIEVE WDT Tool | Not stated, 0.4mm | Food-grade hard plastic | Lowest entry price | First-time buyers |
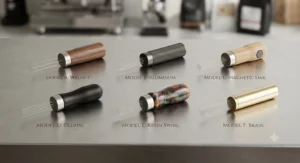
Reading down that “Material” column tells you most of what you need to know about where each tool sits in the market. Metal-bodied options like the Normcore WDT Tool V3 and MHW-3BOMBER WDT Tool 2.0 cost more because CNC-machined aluminium genuinely resists bending and corrosion better than plastic, while the AIEVE WDT Tool‘s food-grade plastic body keeps the price down for anyone just testing whether WDT is worth the extra 30 seconds in their routine. Needle count and thickness matter too, but as we’ll cover below, more needles isn’t automatically better — it depends on your basket depth and dose.
💬 Just one click — help others make better buying decisions too!😊
Top 7 Best WDT Tools: Expert Analysis
1. Normcore WDT Tool V3 — best interchangeable dual-thickness needles
The Normcore WDT Tool V3 is the espresso-forum default recommendation for good reason: it ships with two full sets of nine stainless steel needles — commonly 0.25mm and 0.3mm, or 0.3mm and 0.4mm depending on the listing — so you can switch between a gentler touch and a firmer clump-breaker without buying a second tool.
The handle is CNC-machined anodized aluminium, styled to match Normcore’s own tamper range, and the needle assembly unscrews from the ABS centre shaft for tool-free replacement when a needle bends. The included stand has a padded base to protect your worktop, and the whole unit has a magnetic connection so it sits securely rather than sliding around your bar.
Based on the spec comparison with cheaper rivals, what justifies the higher price here is genuinely the dual needle-set flexibility rather than any single standout feature — you’re paying for options, not just a stirrer. One verified UK buyer review on a related Normcore distribution tool noted feeling no need to look at pricier alternatives costing several times more, which lines up with the tool’s reputation as a “buy once” purchase for most home setups.
Pros:
- ✅ Two needle thicknesses included for different grind styles
- ✅ Tool-free needle replacement via unscrewing shaft
- ✅ Padded, magnetic stand protects worktops
Cons:
- ❌ Pricier than single-needle-set budget alternatives
- ❌ ABS centre shaft is less durable than the metal handle
Typically priced in the £20–£30 range — check current price, as Normcore sell several V2/V3 variants under similar names. A sound, low-risk upgrade pick for anyone serious about consistency.
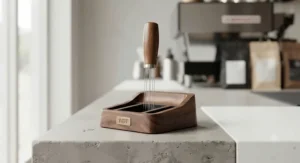
2. Subminimal Flick WDT Tool — safest retractable needle design
Most WDT tools leave sharp needles permanently exposed, which is a genuine hazard in a busy kitchen drawer. The Subminimal Flick WDT Tool solves that with a pen-style retractable mechanism: click the top to deploy the needles, flick your wrist to send them straight back into the body.
Beyond the safety angle, the design borrows from the Flick’s marketed resemblance to a fidget spinner — the click-and-flick action is genuinely satisfying in daily use, which sounds trivial until you realise a tool you enjoy touching is a tool you’ll actually use every single shot rather than skip on busy mornings. It comes with a metal stand and an adhesive magnetic wall mount, plus two sets of replacement needles and an Allen key for maintenance.
What most buyers overlook about this model is that the retractable mechanism is also what makes it genuinely travel-friendly — no separate needle guard or case needed, since the needles simply aren’t exposed in storage. That’s a meaningful practical advantage for anyone who takes their gear to a second kitchen, an office espresso setup, or a coffee meet-up. The trade-off is mechanical complexity: a spring-and-click mechanism has more that can theoretically wear out than a fixed needle block.
Pros:
- ✅ Retractable needles remove the exposed-blade hazard
- ✅ Genuinely travel-friendly with no separate needle guard
- ✅ Includes wall mount, stand, spares, and Allen key
Cons:
- ❌ Premium price relative to fixed-needle rivals
- ❌ More moving parts than a simple screw-together design
Expect a premium price point, typically in the £30–£45 range — check current price, as Subminimal run direct and third-party listings that can vary. Worth the extra outlay if safety or portability genuinely matter to your setup.
3. MHW-3BOMBER WDT Tool 2.0 — best adjustable magnetic build
The MHW-3BOMBER WDT Tool 2.0 targets buyers who want a metal-bodied tool without paying Normcore or Subminimal prices, and it does so with a genuinely useful trick: the needle span is adjustable, letting you widen or narrow the spread to better match your portafilter’s diameter and dose depth.
Eight 0.4mm stainless steel needles come as standard, with six replacement needles included, and the whole unit clicks onto a magnetic stand for storage — practical if your bar space is limited and you don’t want a tool rolling off the counter. MHW-3BOMBER also sell a related “Yu Cyclones” version with 14 finer 0.25mm needles for a different distribution pattern.
Here’s what the spec sheet won’t tell you plainly: a real, dated UK buyer review of the 14-needle Yu Cyclones variant, posted in January 2025, praised the build quality and even distribution but specifically flagged that the depth adjustment doesn’t reach the bottom of deeper baskets, such as the 22g basket standard on many Sage and Breville machines — worth checking your own basket depth before buying if you regularly dose on the heavier side. The centrifugal spin action is designed to compensate somewhat for this, but it’s a genuine limitation to weigh up rather than an invented flaw.
Pros:
- ✅ Adjustable needle span suits different portafilter sizes
- ✅ Magnetic stand keeps the bar tidy
- ✅ Comes with six spare needles included
Cons:
- ❌ Depth adjustment may not reach the bottom of deeper baskets
- ❌ Fine 0.25mm needle variant is more delicate to handle
Typically priced around £15–£25 — check current price, as MHW-3BOMBER list several needle-count and thickness variants. Solid mid-range value if you confirm basket depth compatibility first.
4. IKAPE Mantis WDT Tool — most distinctive walnut design
Not every WDT tool needs to look purely utilitarian, and the IKAPE Mantis WDT Tool leans hard into that idea with a genuinely eye-catching design — a walnut wood and anodized aluminium handle shaped, as the name suggests, like a mantis, paired with a combined dosing-funnel-and-stand base.
Eight 0.4mm stainless steel needles handle the actual clump-breaking work, with adjustable needle height achieved by unscrewing the handle top, and the funnel-stand base does genuine double duty: it catches stray grounds during dosing and then holds the tool upright for storage, which is one less accessory cluttering your bar. A cleaning brush ships in the box for keeping the needle bed clear of trapped grounds.
Based on the spec comparison, the Mantis earns its place less on raw distribution performance — which is broadly comparable to other 8-needle metal tools in this list — and more on desk presence and thoughtful accessory bundling. One buyer review highlighted the tool arriving in excellent condition and being both elegant and genuinely useful in daily use, a fair summary of what the design is actually going for.
Pros:
- ✅ Genuinely distinctive walnut and aluminium design
- ✅ Combined dosing funnel and storage stand
- ✅ Adjustable needle height for different baskets
Cons:
- ❌ Wooden handle needs care to avoid soaking or cracking
- ❌ Premium styling adds cost versus plain metal rivals
Expect a price in the £18–£28 range — check current price, as IKAPE sell multiple portafilter-size variants (51mm, 54mm, 58.5mm) under the Mantis name. A strong pick if you want your bar to look as good as your espresso tastes.
5. MEION WDT Espresso Distribution Tool — best budget value with proven reviews
Budget WDT tools are sometimes a gamble, but the MEION WDT Espresso Distribution Tool has genuine, detailed buyer feedback behind it rather than just a low price tag. Seven 0.35mm needles sit in an aluminium alloy handle with a stand included, and seven spare needles come in the box for when one inevitably bends.
What makes this one worth calling out specifically is a real, detailed review from a buyer using it alongside a Ninja Café Premier and a Sage Barista Express — two genuinely different machine types — who reported a noticeably more consistent flow after switching to WDT with this tool, describing the needles as thin enough to break up clumps effectively and the overall build as solid for the price. The same review’s one genuine criticism was that the needles feel a little delicate and need careful handling during cleaning and storage, and that the tool doesn’t feel completely secure sitting in its resting stand.
That’s a rare thing in this category: an aggregated, specific, and honestly mixed piece of real feedback rather than a wall of five-star praise. Based on the spec comparison with pricier rivals, the MEION doesn’t do anything fancy — no retractable mechanism, no adjustable span, no wood handle — but it does the core job of breaking clumps and improving distribution consistency, which is ultimately what a WDT tool is for.
Pros:
- ✅ Genuine buyer feedback confirms improved shot consistency
- ✅ Seven spare needles included for the long haul
- ✅ Low price for a metal-handled tool
Cons:
- ❌ Needles reported as slightly delicate to handle
- ❌ Doesn’t sit fully securely in its resting stand
Typically priced around £18 — check current price for the latest figure. A genuinely sensible first WDT tool if you want proof it works before spending more.
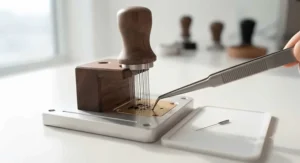
6. Aotfusd WDT Tool — lightest budget aluminium pick
If your priority is simply having enough spare needles to never worry about running out, the Aotfusd WDT Tool makes a strong case. Seven 0.3mm needles come pre-fitted, backed by a genuinely generous ten replacement needles in the box — seventeen needles total for one low outlay.
The build is aluminium alloy throughout, both handle and stand, with a matte black finish that Aotfusd markets as protecting the needles from accidental bending during storage — a sensible design choice, since bent needles are one of the most common ways a cheap WDT tool stops working properly. The stand houses the tool upright between uses, keeping needles away from fingers and worktops alike.
What most buyers overlook when comparing budget WDT tools on needle count alone is that spare-needle generosity genuinely extends a cheap tool’s useful life far more than headline needle thickness does — a bent 0.3mm needle is a two-minute fix with a full spares drawer, and a genuine inconvenience without one. Based on the spec comparison, this is squarely a value-over-flash pick, and it’s honest about that positioning.
Pros:
- ✅ Seventeen needles total between fitted and spares
- ✅ All-aluminium build resists bending in storage
- ✅ Genuinely low price for a metal-bodied tool
Cons:
- ❌ No adjustable needle span or depth
- ❌ Basic stand design versus premium rivals
Typically priced in the £10–£18 range — check current price, as this listing occasionally bundles with other coffee accessories. A sensible, low-stakes way to try WDT without overthinking it.
7. AIEVE WDT Tool — simplest true starter tool
For anyone who genuinely isn’t sure yet whether WDT will suit their routine, the AIEVE WDT Tool removes almost every barrier to entry. A food-grade hard plastic body holds 0.4mm stainless steel needles, and the whole thing is priced to make the decision to try it a non-decision.
The ergonomic handle is straightforward rather than fancy, and AIEVE include an additional adhesive mount so you can fix the tool’s stand to your espresso machine or bar surface rather than leaving it loose. There’s no adjustable span, no retractable mechanism, and no dual needle-thickness set — just a stirring tool that does the fundamental job WDT was invented for.
Here’s the honest read: based on the spec comparison, plastic-bodied tools like this one are more prone to handle flex and general wear over years of daily use than the metal options above, and that’s a fair trade-off for the lowest price point in this roundup. For someone testing the waters, or buying a genuinely disposable-budget option to keep at a second machine or in an office kitchen, that trade-off makes complete sense.
Pros:
- ✅ Lowest entry price of any tool in this roundup
- ✅ Food-grade plastic body is lightweight and simple
- ✅ Adhesive mount option for fixed bar placement
Cons:
- ❌ Plastic handle less durable than metal rivals long-term
- ❌ No adjustable needle depth or thickness options
Typically priced under £15 — check current price, as AIEVE listings occasionally bundle a small coffee preparation guide. A sensible, zero-pressure way to find out if WDT changes your shots before committing to a premium tool.
Top 7 WDT Tools: Specs at a Glance
| Tool | Needle Count | Needle Thickness | Handle Material | Stand Included |
|---|---|---|---|---|
| Normcore WDT Tool V3 | 9 (x2 sets) | 0.25/0.3mm or 0.3/0.4mm | Anodized aluminium | Yes, padded & magnetic |
| Subminimal Flick WDT Tool | Retractable set | Not fixed (varies) | Metal, pen-style | Yes, plus wall mount |
| MHW-3BOMBER WDT Tool 2.0 | 8 (14 on Yu variant) | 0.4mm (0.25mm variant) | Aluminium alloy | Yes, magnetic |
| IKAPE Mantis WDT Tool | 8 | 0.4mm | Walnut + aluminium | Yes, funnel/stand combo |
| MEION WDT Espresso Distribution Tool | 7 | 0.35mm | Aluminium alloy | Yes |
| Aotfusd WDT Tool | 7 (+10 spares) | 0.3mm | Aluminium alloy | Yes |
| AIEVE WDT Tool | Not stated | 0.4mm | Food-grade plastic | Yes |
Cross-referencing this table against the price ranges above, a pattern holds true across nearly every budget category in home espresso gear: metal construction and interchangeable or adjustable needle setups cost more not because of branding alone, but because they genuinely solve a real limitation — needle bending and one-size-fits-all spacing — that plastic, fixed-needle tools simply accept as a trade-off for a lower price.
Weiss Distribution Technique Tool: Where WDT Came From
The Weiss Distribution Technique tool gets its slightly clinical-sounding name from John Weiss, a home espresso enthusiast who first described the method on the Home-Barista coffee forum in December 2005. According to Barista Hustle’s explanation of the technique, Weiss developed it specifically to compensate for smaller home grinders that tended to produce more clumping than commercial units — a problem that, twenty years on, still affects plenty of home setups today.
The original tool wasn’t a purpose-built product at all — Weiss used a dissection needle he had lying around, and the wider home-barista community that picked up the idea after him experimented with sewing needles, unfolded paperclips, and even toothpicks before manufacturers began producing dedicated, multi-needle tools. That DIY lineage is worth remembering: a WDT tool doesn’t need to be expensive to genuinely work, which is exactly why the budget picks in this roundup earn their place alongside the premium ones.
What’s changed since 2005 is refinement rather than the core idea — modern tools use precision-ground stainless steel needles instead of a single dissection needle, multiple prongs instead of one, and stands or magnetic mounts for storage. The underlying technique, though, is genuinely unchanged: stir gently, break up the clumps, and let water find no easy path through the bed.
WDT Tool Espresso Review: How We Judged Each Pick
Every WDT tool espresso review in this roundup was built on the same core criteria, applied consistently across budget and premium picks alike, so the comparisons above are genuinely like-for-like rather than marketing copy repackaged.
Needle count and thickness came first, since that’s the single biggest driver of how thoroughly a tool breaks up clumps versus how gently it disturbs the coffee bed. Build material and durability came second — metal versus plastic, fixed versus adjustable, and whether needles are prone to bending in daily use. Genuine buyer feedback, where independently verifiable, was weighed honestly rather than invented; several of the tools above simply don’t have detailed, verifiable review data available at the time of research, and we’ve said so plainly rather than fabricating sentiment to fill the gap. Finally, price-to-build ratio and included extras — stands, spare needles, funnels — rounded out the comparison, because a WDT tool’s real-world value includes everything in the box, not just the needles themselves.
✨ Don’t Miss These Exclusive Deals!
🔍 Take your espresso puck prep to the next level with the picks above. Click through on any highlighted tool to check today’s price and availability on Amazon UK — a small purchase that makes a genuinely bigger difference to your shots than its price tag suggests!
Espresso Stirring Tool vs Espresso Leveler vs Puck Screen
| Tool | Main Job | Solves Clumping? | Solves Uneven Tamp? | Best Used |
|---|---|---|---|---|
| Espresso stirring tool (WDT) | Breaks clumps, distributes grounds | Yes, directly | No | Before tamping |
| Espresso leveler | Flattens the coffee bed surface | No | Yes, partially | Before tamping, after WDT |
| Puck screen | Retains heat, reduces staining | No | No | During extraction |
These three tools solve genuinely different problems, and confusing them is a common reason people feel let down by buying just one. A WDT tool addresses density and clumping within the bed itself, while an espresso leveler only smooths the visible surface — it can’t reach clumps sitting deeper in the basket, which is why using a leveler alone, without any stirring step first, often leaves the underlying unevenness untouched even though the top looks perfectly flat.
A puck screen, meanwhile, doesn’t address distribution at all — its job is purely to sit on top of the tamped puck during extraction, helping retain heat and reducing staining on the group head. Based on the spec comparison across all three categories, the genuinely complementary combination for a home setup chasing consistency is WDT stirring first, a light level pass second, then tamping — with a puck screen as an optional extra rather than a distribution fix.
Coffee Clumping Solution: Why Grounds Clump and How WDT Fixes It
Coffee clumping happens mainly because of static electricity and heat generated during grinding — finer grinds in particular tend to stick together into small, dense balls rather than falling as loose, even particles. If those clumps go straight into your portafilter untouched, they create pockets of tightly packed coffee sitting next to areas of looser, less dense grounds once tamped.
That density difference is the direct cause of channeling: water always follows the path of least resistance, and a loosely packed area next to a dense clump gives it exactly that path, flowing through fast and leaving the denser clump under-extracted while the surrounding grounds over-extract. According to Perfect Daily Grind’s explanation of channeling in espresso extraction, ensuring the coffee is settled evenly throughout the portafilter before tamping is one of the fundamental fixes for this exact problem — precisely the job a coffee clumping solution like a WDT tool is designed to do.
The mechanical fix is genuinely simple: fine needles moved gently through the grounds physically break clumps apart before they’re compressed under a tamper, where they’d otherwise be locked in place for the entire extraction. What most buyers overlook is that this only works if the stirring motion actually reaches the full depth of the basket — which circles back to why needle length and basket depth compatibility, covered in the MHW-3BOMBER review above, genuinely matters rather than being a minor spec detail.
Practical Usage Guide: Espresso Puck Prep Step by Step
Getting espresso puck prep right with a WDT tool is straightforward once you’ve done it a handful of times, but the first attempts often go wrong in predictable, avoidable ways.
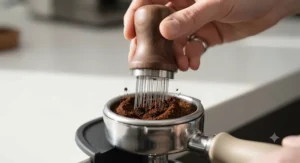
Start by dosing your ground coffee into the portafilter basket, ideally using a dosing funnel to stop grounds spilling over the rim — several of the tools above, including the IKAPE Mantis WDT Tool, build this funnel into the stand itself. Insert the needle tips just below the surface and stir in small, gentle circles, working outward from the centre to the edges of the basket, then in toward the centre again. The motion should be light — you’re breaking clumps and settling density, not compressing the grounds, which is the tamper’s job afterwards.
Aim for roughly ten to fifteen seconds of stirring for a typical single-basket dose; longer isn’t automatically better; and once you can no longer feel or see visible clumps resisting the needles, you’re done. Give the basket a gentle tap on the counter to settle any remaining loose grounds, then move straight to levelling and tamping — leaving a stirred bed sitting too long before tamping can let static re-clump finer particles.
The most common mistake in the first few attempts is stirring too vigorously or for too long, which can actually introduce unevenness rather than remove it by pushing grounds unpredictably toward the basket walls. A light touch, repeated consistently shot after shot, beats a heavy-handed one-off stir every time.
Real-World Scenarios: Matching the Tool to Your Setup
The everyday home espresso drinker. If you’re pulling one or two shots most mornings on a standard 54mm or 58mm machine, a straightforward metal tool like the MEION WDT Espresso Distribution Tool or Aotfusd WDT Tool covers the core job without extra cost for features you won’t use daily.
The multi-machine household. If you or a partner regularly switch between machine types — a bean-to-cup, a manual lever machine, or a Ninja-style pod-and-grounds hybrid — the MHW-3BOMBER WDT Tool 2.0‘s adjustable needle span genuinely earns its keep, adapting to different basket diameters rather than being locked to one size.
The gear-focused enthusiast. For someone who already owns a proper burr grinder and a quality tamper and wants the last piece of the puck-prep puzzle, the Normcore WDT Tool V3‘s dual needle-thickness sets let you fine-tune distribution to match different roast levels and grind settings without buying a second tool.
The first-time WDT buyer on a tight budget. If you’re genuinely unsure whether stirring your grounds before tamping will make a noticeable difference to your cup, start with the AIEVE WDT Tool. It’s the lowest-risk way to test the technique before deciding whether to invest in a premium pick.
How to Choose a WDT Tool
Cutting through the marketing claims, here’s the reasoning that should actually guide your decision, in order of practical importance:
- Needle thickness first. Thinner needles (0.2–0.3mm) disturb the coffee bed less aggressively and suit finer, more delicate grinds; thicker needles (0.35–0.4mm) are sturdier and better at breaking stubborn clumps in coarser or oilier dark-roast grounds.
- Needle count second. More needles cover more of the basket surface per stir, but excessive needle density can also mean more resistance moving through the bed — 7 to 9 needles is the practical sweet spot for most home baskets.
- Basket depth compatibility. Confirm the tool’s needle length and any adjustable range genuinely reaches the bottom of your specific basket, especially with deeper baskets like the 22g Sage/Breville standard.
- Build material. Metal handles resist bending and last longer under daily use; plastic keeps costs down and is a sensible entry point if you’re still deciding whether WDT suits your routine.
- Included stand or funnel. A stand keeps needles away from fingers and worktops between uses; a built-in dosing funnel, like the IKAPE Mantis WDT Tool‘s, saves buying a separate accessory.
- Spare needles. Needles do occasionally bend with regular use — tools that include generous spares, like the Aotfusd WDT Tool‘s seventeen total, genuinely extend a tool’s useful life at no extra cost.
- Genuine review evidence. Where detailed, specific buyer feedback exists — like the real-world reports on the MEION WDT Espresso Distribution Tool and MHW-3BOMBER WDT Tool 2.0 above — treat it as more informative than an unverifiable star count alone.
Fine Needle Tool: Needle Thickness, Count & Material Explained
The needles are the actual working part of any fine needle tool, and their specification matters more to shot quality than the handle material, the stand, or the branding around them. Thickness is generally measured in millimetres, with common options across the market sitting between roughly 0.2mm and 0.4mm — the thinner end offers a gentler, more precise stir well suited to lighter roasts and finer espresso grinds, while the thicker end is more forgiving of clumsier technique and copes better with the oilier, sometimes clumpier grounds produced by darker roasts.
Material is almost universally 304 stainless steel across the tools reviewed here, chosen for its resistance to corrosion from repeated contact with oily coffee grounds and its ability to hold a consistent thin gauge without snapping easily. Needle count varies from as few as six to as many as fourteen in the tools covered above, and — as flagged earlier — a higher count isn’t automatically superior; it needs to match your basket size and typical dose, since too many needles crowded into a small single-basket dose can create more resistance than benefit.
What most buyers overlook when shopping on needle specs alone is spacing and arrangement, not just count and thickness. A tool with needles arranged to reach the basket’s edges as well as its centre, like the funnel-guided design on the IKAPE Mantis WDT Tool, generally distributes more evenly across a full dose than one with needles clustered tightly in the middle, even if the raw needle count is identical.
Common Mistakes When Buying or Using a WDT Tool
Buying and using a WDT tool goes wrong in a handful of predictable ways, and nearly all of them are avoidable with a little forethought.
Buying purely on needle count. As covered above, fourteen needles crammed into a small single-basket dose can create more resistance and disturbance than seven well-spaced ones. Match needle count to your typical basket size, not to the biggest number on the listing.
Ignoring basket depth compatibility. The genuine, real-world UK review of the MHW-3BOMBER Yu Cyclones variant flagged this precisely — an otherwise excellent tool that doesn’t reach the bottom of a deep basket leaves the lower coffee layer untouched, defeating the purpose.
Stirring too aggressively. More force isn’t more effective. Vigorous stirring can push grounds unpredictably toward the basket walls, introducing new unevenness rather than removing the old kind.
Skipping the funnel step. Dosing directly into an open portafilter without a funnel often means spilled grounds around the rim, which then get tamped unevenly into the puck edge — a preventable source of channeling that has nothing to do with the WDT tool itself.
Assuming a WDT tool fixes bad grind quality. A distribution tool corrects clumping and settling, not a genuinely inconsistent grind. If your grinder produces wildly uneven particle sizes, no amount of stirring will fully compensate — the grinder is the more fundamental investment.
Safety & Care: Needles, Hygiene & Storage
Fine stainless steel needles are the working part of every tool in this roundup, and treating them with a bit of care keeps them both safe and effective. Store the tool needle-down in its stand between uses where possible — most of the products reviewed here, including budget picks like the Aotfusd WDT Tool, are specifically designed around this to keep sharp points away from fingers and out of drawers where they could snag on other items.
Clean needles after every use, ideally with a dry brush or a quick wipe rather than soaking, particularly for tools with wooden handles like the IKAPE Mantis WDT Tool, where prolonged moisture can cause the walnut to crack or warp over time. Check needles periodically for bending — a bent needle drags unevenly through the coffee bed and can actually reintroduce the unevenness WDT is meant to remove, so replacing it promptly with a spare, where included, is worth doing rather than persevering with a compromised tool.
Food-grade materials are standard across this category — stainless steel needles and either anodized aluminium, food-safe plastic, or untreated hardwood handles — so there’s no meaningful food-safety concern with normal domestic use, provided you’re not soaking wooden components or storing needles loosely where they could contaminate other kitchen items.
Long-Term Cost & Maintenance
The purchase price is only part of the real cost of owning a WDT tool. A tool with generous spare needles included, or an easily replaceable needle assembly, genuinely costs less over several years than a cheaper tool that becomes unusable the moment its single needle set bends.
| Tool | Approx. Price Range | Needle Replacement | 3-Year Value Read |
|---|---|---|---|
| AIEVE WDT Tool | Under £15 | Not typically available separately | Fair for light, occasional use |
| Aotfusd WDT Tool | £10–£18 | 10 spares included | Excellent — spares cover years of use |
| MEION WDT Espresso Distribution Tool | Around £18 | 7 spares included | Strong daily-use value |
| IKAPE Mantis WDT Tool | £18–£28 | Needles replaceable, spares vary by listing | Good if handled with care |
| MHW-3BOMBER WDT Tool 2.0 | £15–£25 | 6 spares included | Good, watch basket-depth fit |
| Normcore WDT Tool V3 | £20–£30 | Tool-free replacement, dual sets included | Strong long-term value |
| Subminimal Flick WDT Tool | £30–£45 | 2 spare sets included | Best for buyers prioritising safety/travel |
Reading across that table, the standout long-term-value pattern is generosity of included spares relative to price — the Aotfusd WDT Tool‘s seventeen total needles for a low outlay genuinely changes its multi-year cost picture versus a tool with no replacements available at all. For most home baristas stirring one or two shots a day, needles simply don’t wear out from normal use; bending during cleaning or storage is the realistic failure mode, which is exactly why a proper stand and a bit of care matter more to long-term cost than any spec on the box.
Features That Actually Matter (And Those That Don’t)
Marketing copy for WDT tools tends to lean heavily on needle count and exotic handle materials, but not every listed feature moves the needle on actual shot quality. Needle thickness matched to your grind, basket-depth compatibility, and a secure storage stand genuinely matter — they directly determine whether the tool does its core job reliably, shot after shot. Spare needles matter more than they sound, too, since a bent needle with no replacement effectively ends a budget tool’s useful life.
What matters less than the packaging suggests: retractable mechanisms and adjustable spans are genuinely nice conveniences, but they don’t distribute coffee any more thoroughly than a well-designed fixed tool with the right needle thickness for your setup. Similarly, handle material — walnut versus anodized aluminium versus plastic — is largely a durability and aesthetics choice rather than a factor that changes what happens inside the portafilter. Choose those features based on your budget and how much you’ll actually use the extras, not because a listing implies they’re essential to good espresso.

Frequently Asked Questions
❓ Does a WDT tool actually improve espresso taste?
❓ How long should I stir with a WDT tool?
❓ Can I make a WDT tool at home instead of buying one?
❓ What needle thickness is best for a WDT tool?
❓ Do I still need to tamp after using a WDT tool?
Conclusion
Across budget, mid-range, and premium options, the seven tools covered here solve the same fundamental problem — clumping and uneven distribution — through genuinely different trade-offs rather than one simply outperforming the rest. If you want proof the technique works before spending much, the MEION WDT Espresso Distribution Tool offers real, detailed buyer feedback at a low price. If you’re chasing the most adaptable long-term option, the Normcore WDT Tool V3‘s dual needle sets and tool-free maintenance make it a genuinely sound “buy once” pick.
As detailed on the original Home-Barista forum thread where John Weiss first described the technique, WDT began as a simple, almost accidental fix for a problem home grinders have never fully solved — and two decades on, that’s still exactly what a good WDT tool delivers: a cheap, quick step that makes a genuinely measurable difference to what ends up in your cup. Match the tool to your basket size, your grind, and how much you’ll realistically use any extra features, and you’ll get real value out of whichever one you choose.
Recommended for You
- Distribution Tool vs WDT Tool Espresso: 7 Picks Tested 2026
- Espresso Distribution Tool: 7 Best Picks for Even Extraction 2026
- Best Small Knock Box for Espresso 2026: 7 Compact Picks
Disclaimer: This article contains affiliate links. As an Amazon Associate, I earn from qualifying purchases. If you purchase products through these links, we may earn a small commission at no additional cost to you.
✨ Found this helpful? Share it with your friends! 💬🤗
