
In This Article
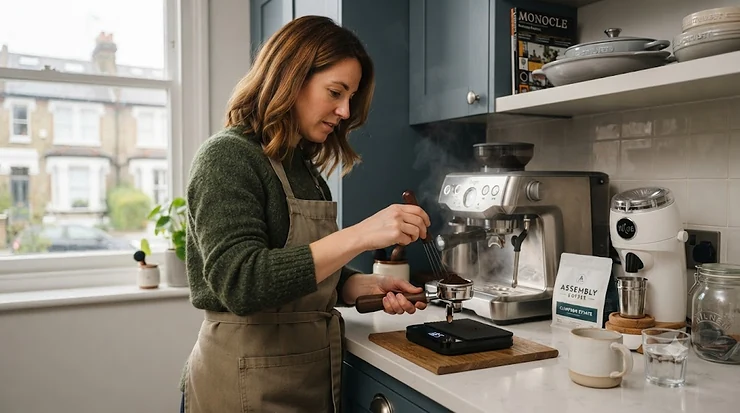
Every espresso disaster starts the same way: a beautiful, even pour… followed by a sudden, ugly spurt from one corner of the basket. That’s channeling, and nine times out of ten, the culprit is sitting right there in your portafilter — clumped grounds that water found a shortcut through. A WDT tool for clumping coffee exists to solve exactly this problem, and it’s arguably the cheapest, highest-impact upgrade you can make to a home espresso setup. What is a WDT tool? In short, it’s a handful of ultra-fine needles (usually 0.25mm-0.4mm) mounted on a handle, used to stir freshly ground espresso coffee before tamping so clumps break apart and grounds settle into an even, uniform bed. It costs less than a bag of decent beans and, according to most home baristas who’ve tried it, delivers one of the biggest jumps in shot consistency of any single accessory — a point echoed in this detailed CoffeeGeek guide to the Weiss Distribution Technique, which walks through why the method became close to essential in specialty coffee circles. This guide walks through seven real WDT tools worth buying in 2026, explains the actual physics behind clumping (hint: it’s not really about “boulders,” it’s about electricity), and gives you a practical framework for choosing, using, and maintaining one so your espresso stops fighting you every single morning.
Quick Comparison Table
| Tool | Needle Count | Price Range | Best For |
|---|---|---|---|
| Subminimal Flick WDT Tool | 8 x 0.4mm (retractable) | £30-£40 | Safety-conscious daily users |
| Normcore WDT Distribution Tool V3 | 9-prong, 0.25-0.3mm | £30-£38 | Wide-spacing precision |
| IKAPE Adjustable WDT Tool | 6 x 0.4mm + 6 x 0.25mm | £18-£25 | Angled, hard-to-reach corners |
| Barista Hustle AutoComb | Mechanical rotating module | £160-£190 | Repeatable, café-grade prep |
A glance at this table tells you most of what you need to know before diving deeper: price does not scale neatly with performance here, because a £20 tool with the right needle geometry can outperform a £35 one with the wrong spacing. What actually separates these four (and the three others covered further down) is needle thickness, spacing, and how safely you can store the thing without stabbing yourself reaching into a drawer. The Barista Hustle AutoComb sits in an entirely different category — it’s less a stirring stick and more a small machine — and it’s really only worth the jump for someone chasing café-level repeatability rather than a marginal gain over a decent manual tool.
💬 Just one click — help others make better buying decisions too!😊
Top 7 WDT Tools for Clumping Coffee: Expert Analysis
1. Subminimal Flick WDT Tool — retractable needles for one-handed safety
The standout feature of the Subminimal Flick WDT Tool is its click-to-deploy, flick-to-retract mechanism, which means the needles are only ever exposed while you’re actually using them. Under the hood it ships with 8 needles at 0.4mm as standard, with a spare set of 0.35mm needles included for finer work, and a magnetic aluminium base that lets it stand freely or clip onto the side of your grinder or espresso machine. Based on the spec comparison with basic wooden-handled tools, the retractable design solves the single biggest complaint about WDT tools generally: sharp needles left loose in a drawer or a cup near small children or clumsy elbows. This is the pick for anyone making espresso daily who wants a tool that lives permanently on the counter without becoming a hazard. Reviewers consistently report that the pen-style body feels premium in the hand and that the “click” action becomes a genuinely satisfying part of the morning ritual, with several comparing it to a fidget toy that happens to make better coffee. A common thread in user feedback is that the fine 0.4mm needles glide through the grounds with minimal resistance, breaking up clumps without excessive fines migration to the bottom of the bed.
Pros:
- ✅ Retractable needles remove the stabbing hazard entirely
- ✅ Dual magnetic and stand-based storage options
- ✅ Two needle gauges included for different grind sizes
Cons:
- ❌ Costs more than twice a basic fixed-needle tool
- ❌ Retraction mechanism adds a moving part that can wear over time
At around £30-£40, the Subminimal Flick WDT Tool sits at the upper end of the manual-tool bracket, but for daily users the safety and durability trade-off is easy to justify.
2. Normcore WDT Distribution Tool V3 — widely spaced 9-prong needles
The Normcore WDT Distribution Tool V3 distinguishes itself with genuinely wide needle spacing — a detail that sounds trivial until you’ve used a tool where the needles are bunched so tightly they just plough a single channel through the grounds instead of separating them. Its 9 prongs run at 0.25mm to 0.3mm depending on the batch, mounted in a walnut wood or anodised aluminium handle with a matching stand. What most buyers overlook about needle spacing is that it directly determines how much of the coffee bed a single stirring pass actually touches; tightly clustered needles look precise on paper but often just drag clumps sideways rather than fracturing them. Coffee community discussion around this style of tool (the wide-prong “Duomo-style” design) consistently flags it as one of the more effective layouts precisely because of that spacing advantage. This is the right call for anyone who has already tried a cheap bunched-needle tool and found their shots still running unevenly despite regular stirring — the fix often isn’t more stirring, it’s better geometry. Aggregated reviewer sentiment for the Normcore range highlights sturdy build quality and needles that resist bending, though a handful of buyers note the aluminium handle gets cold quickly in an unheated kitchen, which is a minor gripe rather than a functional flaw.
Pros:
- ✅ Wide needle spacing reaches more of the coffee bed per pass
- ✅ Solid wood or anodised aluminium construction
- ✅ Comes with a dedicated stand for hygienic storage
Cons:
- ❌ Needles are fixed and can’t be swapped for a finer gauge
- ❌ Premium pricing compared with generic alternatives
Expect to pay somewhere in the £30-£38 range, which places it directly against the Subminimal Flick WDT Tool — the deciding factor between the two usually comes down to whether you value retractability or needle geometry more.
3. Barista Space C3 Needle Distribution Tool — 58mm barista-standard sizing
The Barista Space C3 Needle Distribution Tool is built around a practical detail that’s easy to underrate: its 58mm profile is sized to match the industry-standard portafilter basket diameter, so the needle spread naturally covers the full bed without you having to sweep the edges separately. Specs-wise it’s a straightforward fixed-needle design in a lightweight polymer and metal handle, positioned squarely as a mid-range option rather than a premium showpiece. Here’s what to weigh: this tool won’t win any design awards next to the Subminimal Flick WDT Tool, but the sizing logic means less technique compensation is needed to get even coverage, which matters more for a beginner still building muscle memory than a flashy mechanism does. Barista Space has built a loyal following among café-supply buyers in the UK and EU, and aggregated feedback on their accessory range points to consistent manufacturing tolerances — something cheaper unbranded imports frequently fail to deliver, where needle count or thickness varies noticeably between units of the “same” product. For a first WDT tool, this is a sensible entry point that avoids the two most common failure modes of budget imports: needles that are too thick to be useful and needles that bend on first use.
Pros:
- ✅ 58mm sizing matches standard portafilter baskets
- ✅ Consistent manufacturing quality versus generic imports
- ✅ Lightweight and easy to manoeuvre
Cons:
- ❌ Needles are not swappable or field-replaceable
- ❌ Less premium feel than metal-bodied alternatives
At a typical £15-£22, the Barista Space C3 Needle Distribution Tool represents strong value for someone who wants a branded, reliable option without paying premium-tier prices.
4. IKAPE Adjustable WDT Tool — angled needles for basket corners
What sets the IKAPE Adjustable WDT Tool apart is a tilted pin layout with up to 120 degrees of angle adjustment, specifically engineered to reach the corners and rim of the filter basket where vertical tools typically leave grounds untouched. It ships with two interchangeable needle sets — 6 needles at 0.4mm for general use and 6 at 0.25mm for finer, more delicate stirring — attached to a magnetic saucer-shaped stand. On paper this means the tool is solving a genuinely different problem to most WDT designs: edge-channeling, where water sneaks around the outer rim of the puck rather than through clumps in the centre. What most buyers overlook is that centre clumping and edge channeling are actually two separate failure modes, and a tool optimised purely for straight-down stirring can miss the second one entirely. Reviewers who’ve compared it against straight-needle competitors report noticeably better coverage right at the basket wall, which is precisely the zone hardest to reach with a rigid, non-angled tool. The trade-off is a slightly steeper learning curve, since the angled motion isn’t as intuitive as a simple straight-down stir.
Pros:
- ✅ Angled needles reach basket corners other tools miss
- ✅ Two needle gauges included for coarse and fine grinds
- ✅ Magnetic stand doubles as a display base
Cons:
- ❌ Angled technique takes longer to get comfortable with
- ❌ Bulkier footprint than pen-style tools
Pricing typically sits in the £18-£25 range, making the IKAPE Adjustable WDT Tool one of the more feature-rich options for the money, provided you’re willing to learn the slightly different motion.
5. Woouch WDT Espresso Tool — configurable needle count on a budget
The Woouch WDT Espresso Tool leads with genuine flexibility: it ships with 10 needles at 0.35mm, but they’re individually removable, so you can run anywhere from 4 to 10 depending on your grind size and personal preference. The handle is natural wood with a matching stand, which keeps the whole package firmly in budget territory without feeling like a toy. Based on the spec comparison with fixed-needle rivals, the ability to strip needles down to a lower count is more useful than it sounds — coarser grinds for filter-style prep or lighter roasts often clump less and need fewer, more widely spaced points of contact, while finer espresso grinds benefit from the full set. Reviewers consistently report that this is an easy first WDT tool to recommend to someone who isn’t sure they’ll stick with the ritual, since the entry price removes any sense of risk. The main complaint that surfaces in aggregated feedback is that at the very cheapest end, a small number of buyers received units with slightly bent or uneven needles out of the box, which is a quality-control issue worth checking for on arrival rather than a fundamental design flaw.
Pros:
- ✅ Needles are individually removable and adjustable in count
- ✅ Genuinely low price point for a real WDT tool
- ✅ Wood handle and stand feel nicer than the price suggests
Cons:
- ❌ Occasional quality-control inconsistency reported at this price tier
- ❌ Wood handle needs to be kept away from prolonged moisture
Expect to pay somewhere around £12-£18, which makes the Woouch WDT Espresso Tool one of the easiest “just try it” purchases in this whole roundup.

6. Nessus WDT Espresso Distribution Tool — built-in cleaning brush
The standout trick from the Nessus WDT Espresso Distribution Tool is a built-in cleaning brush hidden inside the base — insert the needles into the base after use and a quick pull removes stuck grounds without you needing a separate brush lying around. Spec-wise it comes with 10 stainless steel needles at 0.35mm plus a spare set of 10 in a storage tube, an aluminium handle, and, like the Woouch WDT Espresso Tool, a configurable count that lets you run 5 to 9 needles depending on preference. What most buyers overlook is how much of the daily friction with any kitchen tool comes from small maintenance tasks rather than the tool’s core function — a WDT tool that’s annoying to clean tends to get used less often, which defeats the point of owning one at all. Here’s what to weigh: the self-cleaning mechanism is a genuinely practical touch rather than a gimmick, and it’s one of the few features in this category that actually reduces daily friction instead of adding a new step. Aggregated buyer feedback highlights the spare needle set as good value, since replacing a bent needle individually is far cheaper than buying an entirely new tool.
Pros:
- ✅ Built-in brush removes cleaning as a separate chore
- ✅ Includes a full spare set of replacement needles
- ✅ Configurable needle count from 5 to 9
Cons:
- ❌ Aluminium handle shows fingerprints and scuffs easily
- ❌ Base mechanism adds bulk versus a simple stick design
At roughly £15-£20, the Nessus WDT Espresso Distribution Tool is a strong pick for anyone who values low-maintenance daily use over premium materials.
7. Barista Hustle AutoComb — mechanical distribution for repeatable results
The Barista Hustle AutoComb, unveiled at the 2022 World Barista Championships, takes an entirely different approach: instead of a handheld needle tool, it’s a small mechanical unit with a portafilter holder and a rotating needle module that applies the Weiss Distribution Technique automatically and consistently every single time. It’s built from anodised aluminium, ABS, acetal, and stainless steel, and was developed specifically to solve uneven espresso distribution in a repeatable way rather than relying on manual technique. Based on the spec comparison with every manual tool on this list, the core advantage here isn’t a better needle — it’s the removal of human inconsistency from the equation entirely, since a rotating module traces the same path every time regardless of how tired or rushed you are. This is squarely aimed at prosumers and small cafés chasing shot-to-shot repeatability rather than home users making one or two coffees a day, and the price tag reflects that positioning clearly. What most buyers overlook is that the value proposition isn’t “better distribution than a needle tool” so much as “identical distribution every single time,” which matters far more when you’re pulling dozens of shots a day than when you’re making one flat white before work. Industry commentary on the tool has been mixed on whether the price premium is justified for anyone outside a commercial setting, with reviewers questioning if it offers meaningfully more than a well-executed manual stir for occasional home use.
Pros:
- ✅ Removes technique variability between shots entirely
- ✅ Sturdy commercial-grade construction
- ✅ Genuinely novel mechanical approach to WDT
Cons:
- ❌ Price is roughly ten times a basic manual tool
- ❌ Overkill for anyone making only one or two shots daily
Priced around £160-£190, the Barista Hustle AutoComb only really earns its keep for high-volume users — for everyone else, one of the manual tools above will get you 90% of the benefit for a fraction of the outlay.
Top 7 Products Comparison
| Tool | Type | Price Range | Rating Signal | Best For |
|---|---|---|---|---|
| Subminimal Flick WDT Tool | Retractable manual | £30-£40 | Strong repeat-purchase sentiment | Daily home users |
| Normcore WDT Distribution Tool V3 | Fixed wide-prong manual | £30-£38 | Praised for build quality | Precision-focused brewers |
| Barista Space C3 Needle Distribution Tool | Fixed manual | £15-£22 | Consistent QC feedback | Beginners wanting reliability |
| IKAPE Adjustable WDT Tool | Angled manual | £18-£25 | Praised for edge coverage | Fixing edge-channeling |
| Woouch WDT Espresso Tool | Configurable manual | £12-£18 | Mixed QC at entry price | First-time buyers on a budget |
| Nessus WDT Espresso Distribution Tool | Configurable manual | £15-£20 | Praised for low-maintenance design | Low-friction daily use |
| Barista Hustle AutoComb | Mechanical | £160-£190 | Mixed on value for home use | Prosumers and small cafés |
Read across this table and a clear pattern emerges: the manual tools cluster tightly between £12 and £40, and within that band the differences are about ergonomics, cleaning, and needle geometry rather than raw effectiveness. The Barista Hustle AutoComb is the outlier, and its price gap versus the rest of the field only makes sense once you accept you’re paying for consistency at volume, not a fundamentally different result on a single shot. If you’re brewing one or two coffees a day, the smarter money almost always sits in that £15-£40 manual bracket rather than stretching for the mechanical option.
Benefits vs Traditional Distribution Methods
| Method | Clump-Breaking Effectiveness | Speed | Learning Curve |
|---|---|---|---|
| WDT needle tool | High | Moderate | Low |
| Tap-and-tamp only | Low | Fast | Very low |
| Spoon or chopstick stir | Moderate | Slow | Low |
| Dosing funnel alone | Low-moderate | Fast | Very low |
Traditional tap-and-tamp technique relies on gravity and vibration to settle grounds, which does almost nothing to physically break apart electrostatically bonded clumps — it just repositions them. A spoon or chopstick stir is better than nothing, but the tines are too thick and too widely spaced to fracture fine clusters the way a proper needle array can. Dosing funnels solve a different problem entirely (mess and spillage during transfer), and pairing one with a WDT tool rather than using either alone gives you the best of both worlds.
Practical Usage Guide: Getting the Most From Your WDT Tool
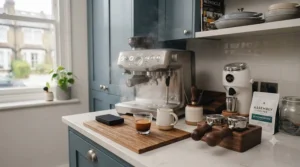
Using a WDT tool for clumping coffee properly is less about brute force and more about a light, deliberate technique, and getting it wrong in the first month is extremely common. Start by dosing your ground coffee into the portafilter basket as usual, ideally with a dosing funnel or collar attached to prevent spillage over the rim. Insert the needles close to vertical and make small, gentle circular motions working from the centre out towards the edges, lifting slightly as you go so the top third of the bed gets redistributed rather than just the surface. A common first-30-days mistake is stirring too aggressively or for too long, which causes fines to migrate downward and settle at the bottom of the basket, creating a dense layer that can actually increase channeling risk rather than reduce it — aim for roughly 5-10 seconds of stirring, not a prolonged mixing session. Once the surface looks fluffy and uniform with no visible clumps or dark wet patches, use a levelling tool or a light tap to settle the bed before tamping normally. For maintenance, rinse needles under warm water after each use if your tool doesn’t have a built-in brush, and dry thoroughly before storage to prevent rust on cheaper stainless needles. Check periodically for bent needles, since even one bent prong will drag rather than pierce and can leave a channel-prone patch behind every time.
Real-World Scenario: Which Tool Fits Which Brewer
Picture three different people standing at three different counters. First, there’s Priya, a university student in a shared flat who makes one espresso before her 9am lecture and doesn’t want anything that could injure a flatmate rummaging through a drawer — for her, the Subminimal Flick WDT Tool‘s retractable needles are worth the extra spend purely for peace of mind. Second, there’s Dave, a retired engineer who’s newly obsessed with dialling in his home setup and enjoys the process as much as the coffee — the IKAPE Adjustable WDT Tool‘s angled needles and two gauge options give him something to genuinely experiment with, and the £18-£25 price fits a hobby budget without feeling frivolous. Third, there’s a small independent café owner pulling 150+ shots a day where staff turnover means technique varies wildly between baristas — here, the Barista Hustle AutoComb‘s mechanical repeatability actually pays for itself by cutting down on wasted, under-extracted shots that would otherwise need remaking. The common thread across all three is that budget, frequency of use, and tolerance for a learning curve should drive the decision far more than which tool has the flashiest marketing.
Problem → Solution: Fixing the Most Common Clumping Issues
Problem 1: Shots run fast on one side and slow on the other. This is classic channeling caused by uneven density in the puck. Solution: switch from a light surface stir to a proper WDT pass reaching all the way to the bottom of the basket, and check your tamp is level.
Problem 2: Grounds stick to the sides of the grinder and portafilter. This points to static build-up rather than clump size specifically. Solution: a light misting of the beans before grinding (the “Ross Droplet Technique”) measurably cuts static, and pairing this with a WDT stir addresses both causes at once.
Problem 3: Puck looks fine but extraction is still bitter or sour inconsistently. Solution: your WDT technique may be over-mixing fines to the bottom; shorten stirring time and check needle thickness isn’t too coarse for your grind setting.
Problem 4: Needles keep bending on cheap tools. Solution: upgrade to a mid-range option like the Barista Space C3 Needle Distribution Tool, where consistent manufacturing tolerances reduce the chance of a weak needle.
Problem 5: You keep forgetting to use the tool at all. Solution: choose a design with magnetic or clip-on storage, like the Subminimal Flick WDT Tool or IKAPE Adjustable WDT Tool, so it lives in your direct line of sight rather than buried in a drawer.
Why Does My Espresso Coffee Clump?
Espresso coffee clumps mainly because grinding generates static electricity, not simply because particles are “sticky.” The grinding process turns whole beans into a flow of highly electrified powder, and it’s this static charge — not the physical size of particles alone — that drives particles to bond together into clumps, altering how densely the grounds pack and how much surface area is left exposed for water during brewing. If you want the full technical breakdown, Oregon researchers published a detailed study on how grinding coffee with a splash of water reduces static and improves extraction, which is where much of this modern understanding of clumping actually comes from. Finer grind settings make the problem worse, since smaller particles have more surface area relative to their mass and are more prone to sticking together electrostatically as well as physically wedging into one another. Humidity, bean freshness, and even the material of your grinder’s chute all play a role in how bad the clumping gets on any given day, which is why the same beans can behave differently on a dry winter morning versus a humid summer one.
How to Fix Clumping Ground Coffee
- Grind fresh, immediately before brewing — grounds exposed to air lose CO2 and become more prone to clumping the longer they sit.
- Consider the Ross Droplet Technique (RDT) — a light spray of water on whole beans before grinding meaningfully cuts static and resulting clumps.
- Use a WDT tool for clumping coffee before tamping — this is the single most direct fix, physically breaking apart clusters a tap-and-tamp routine can’t touch.
- Check your grinder for retained grounds — stale grounds clinging to the chute from a previous grind mix with fresh coffee and behave unpredictably.
- Dial in your grind size properly — too fine a grind for your basket increases both clumping and channeling risk simultaneously.
- Store beans correctly — beans exposed to humidity swings clump more readily once ground, so an airtight container matters more than people expect.
- Don’t over-stir — paradoxically, excessive WDT stirring can compact fines and create a new kind of unevenness, so a light, brief pass is more effective than a long one.
Static Electricity in Coffee: The Real Cause of Grind Clumps
Static electricity in coffee is a well-documented phenomenon, and it’s the mechanism behind most of the clumping frustration home baristas experience. The friction and fracturing of beans as they pass through burrs generates an electrical charge, and that charge is what pulls coffee particles together and makes them stick to grinder surfaces rather than falling cleanly into the portafilter. Researchers have found beans with higher internal moisture produce measurably less static during grinding, which is exactly why coffee professionals have long added a small squirt of water to beans before grinding — the practice reliably resolves problems involving clumping, channeling, and inconsistent extraction. You can read more about the underlying research in this peer-reviewed study on mitigating electrostatic charging during coffee grinding, which lays out the mechanics in far more technical detail than most brewing guides bother to cover. In practical terms for a home setup, this means a WDT tool and the Ross Droplet Technique are solving complementary problems: RDT reduces how much static forms in the first place, while a WDT pass physically breaks apart whatever clumps do still form.
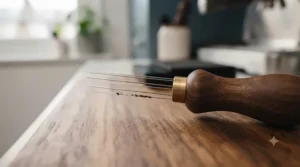
Espresso Grind Distribution: Why It Matters More Than You Think
Espresso grind distribution refers to how evenly grounds are spread and packed across the portafilter basket before tamping, and it’s arguably a bigger lever on shot quality than the grinder itself for most home setups. Two baristas using the exact same beans, same grinder, and same machine can pull wildly different shots purely based on how uniformly the grounds were distributed before compression. Poor distribution creates pockets of varying density; water always takes the path of least resistance, so it rushes through the low-density pockets while barely touching the dense ones, producing a shot that’s simultaneously over-extracted in places and under-extracted in others — a muddled, unbalanced cup even though the total brew time might look “correct” on a timer. This is precisely why WDT has become close to standard practice in specialty coffee circles over the last decade; it’s a cheap, fast way to address the variable that arguably matters most, ahead of pricier upgrades like a better grinder or a fancier machine. If you’re chasing consistency and have to choose between spending £150 on a WDT-equipped mechanical distributor or £150 on grinder burrs, the honest answer for most home setups is that distribution technique closes the gap faster.
Puck Preparation: The Full Workflow
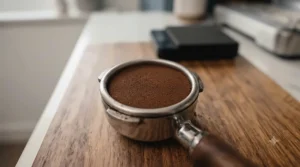
Puck preparation is the umbrella term for everything that happens between grinding and locking the portafilter into the group head, and it’s where most of the “invisible” quality gains in home espresso actually live. A solid workflow runs: dose into the basket using a funnel to avoid mess, WDT stir in small circular motions from centre to edge, level the surface with a distribution tool or the flat edge of a card, then tamp with firm, even, level pressure straight down. Skipping the levelling step is a very common oversight — even a perfectly WDT-stirred bed can end up higher on one side if you tamp without checking it’s flat first, reintroducing the exact unevenness the stirring was meant to fix. Good puck preparation also has a maintenance angle: a consistently prepared puck reduces backflushing needs and extends group head seal life, because even extraction reduces the pressure spikes that come from water forcing itself through unpredictable channels. For anyone serious about consistency, timing the whole sequence — grind, dose, WDT, level, tamp — so it happens quickly and without long pauses matters almost as much as any individual step, since ground coffee begins losing aromatics to the air the moment it leaves the grinder.
✨ Don’t Miss These Exclusive Deals!
🔍 Take your puck preparation to the next level with these carefully selected tools. Click on any highlighted item to check current pricing and availability. A proper WDT tool will help you create authentic café-quality espresso your family will genuinely enjoy!
How to Choose a WDT Tool for Clumping Coffee
- Needle thickness — 0.25mm-0.35mm suits fine espresso grinds; anything much thicker just displaces clumps instead of breaking them.
- Needle spacing — widely spaced prongs cover more of the bed per pass than tightly bunched ones.
- Storage safety — retractable or stand-based designs matter more than they seem to if you have kids, pets, or a chaotic kitchen drawer.
- Handle material — wood feels premium but needs care around moisture; aluminium is more durable but conducts cold.
- Configurability — removable needles let you tailor the tool to different grind sizes and roast levels.
- Cleaning method — built-in brushes genuinely reduce daily friction versus tools that need separate cleaning.
- Budget versus frequency of use — a £150+ mechanical tool only makes sense at high daily shot volumes; occasional home users are almost always better served in the £15-£40 bracket.
Common Mistakes When Buying a WDT Tool
The single most common mistake is assuming more needles automatically means better performance — a 10-needle tool with poor spacing can underperform a well-spaced 5-needle one, since coverage and geometry matter more than raw count. A second frequent misstep is buying the cheapest unbranded option without checking for basic quality control, only to find needles bent or misaligned within the first few uses, which is a recurring theme in aggregated feedback on budget imports. Buyers also sometimes overlook storage entirely, picking a tool with loose exposed needles and no stand, which either gets shoved into a drawer (unsafe) or left out on the counter (also unsafe, and unhygienic). Finally, some people overspend on a mechanical distributor like the Barista Hustle AutoComb expecting a dramatically better cup than a manual tool delivers, when in reality the main benefit is repeatability at volume rather than a fundamentally different result for a single shot.
WDT Tool for Clumping Coffee vs Traditional Distribution Methods
Comparing a dedicated WDT tool against older-school distribution habits — tapping the portafilter on the counter, using a spoon, or simply tamping harder — makes the case for needle-based tools fairly clearly. Tapping relies on vibration and gravity, which can actually make clumping worse by compacting loosely bonded clusters into denser ones rather than separating them. A spoon or chopstick, while better than nothing, has tines too thick to penetrate fine clumps the way a genuine 0.25-0.4mm needle can, so it tends to just relocate rather than fracture problem areas. Tamping harder is possibly the most persistent myth in home espresso circles — no amount of tamp pressure can fix uneven density that was baked in before compression, since tamping only compresses what’s already there rather than redistributing it. The practical upshot is that a WDT pass addresses the problem at its source, before compression locks any unevenness in place, which is why it’s become close to standard practice among specialty-focused home baristas rather than a niche gimmick.
Long-Term Cost & Maintenance
A basic WDT tool like the Woouch WDT Espresso Tool or Nessus WDT Espresso Distribution Tool carries essentially no ongoing cost beyond the initial £12-£20 outlay, provided you rinse and dry the needles after use to prevent rust. Mid-range and premium manual tools such as the Subminimal Flick WDT Tool or Normcore WDT Distribution Tool V3 may eventually need a replacement needle set if one bends, though most ship with spares or sell replacements separately for a few pounds. The real cost consideration is the Barista Hustle AutoComb, where the mechanical module represents a bigger investment that only delivers strong ROI at high shot volumes; for a household making two or three coffees a day, the payback period in “time saved” or “quality gained” versus a £20 manual tool is genuinely hard to justify. Across the board, total cost of ownership for any WDT tool is dwarfed by what you’d spend on beans over the same period, which is part of why it’s consistently flagged as one of the best value-for-money upgrades available to a home espresso setup.
Frequently Asked Questions
❓ What is a WDT tool for clumping coffee?
❓ Why does my espresso coffee clump even with a good grinder?
❓ How to fix clumping ground coffee without buying a tool?
❓ What needle thickness is best for a tool for clumping espresso grounds?
❓ Does espresso grind distribution really matter for taste?
Conclusion
Clumping feels like a small, fiddly problem until you realise it’s quietly undermining almost every shot you pull, and the fix is genuinely one of the cheapest upgrades in the entire home espresso hobby. Whether you land on the safety-first Subminimal Flick WDT Tool, the wide-spacing precision of the Normcore WDT Distribution Tool V3, a budget-friendly option like the Woouch WDT Espresso Tool or Nessus WDT Espresso Distribution Tool, or go all-in on the mechanical repeatability of the Barista Hustle AutoComb, the underlying principle stays the same: break up the static-formed clumps before they lock into an uneven puck. Pair whichever tool you choose with proper puck preparation — dose, stir gently, level, tamp — and you’ll likely notice more consistent shots within the first few attempts, not months down the line. As with most espresso upgrades, the biggest jump in quality tends to come from technique paired with the right tool, not the tool alone, so give yourself a little patience while the motion becomes second nature. If you’d like to understand the wider brewing context beyond puck prep, the Wikipedia entry on espresso is a well-sourced starting point for how extraction and pressure interact more broadly.
✨ Ready to stop wrestling with channeling and clumped grounds?
🔍Check current prices on the WDT tools above and pick the one that matches how you actually brew — your next shot could be the most even one you’ve ever pulled!
Recommended for You
- Best WDT Tool 2026: 7 Top Espresso Distribution Tools UK
- Distribution Tool vs WDT Tool Espresso: 7 Picks Tested 2026
- Espresso Distribution Tool: 7 Best Picks for Even Extraction 2026
Disclaimer: This article contains affiliate links. As an Amazon Associate, I earn from qualifying purchases. If you purchase products through these links, we may earn a small commission at no additional cost to you.
✨ Found this helpful? Share it with your friends! 💬🤗
